Commercial Downlights do more than brighten a ceiling. They shape how customers see products, how staff read labels, and whether a room feels comfortable after hours. A narrow beam can make a display pop, yet leave dark patches between fittings. In a corridor, glare from a poorly positioned lens can be distracting. Small choices matter.
The market has changed quickly. The U.S. Department of Energy’s 2021 U.S. Lighting Market Characterization estimated that LED technologies made up about 48% of installed lighting in 2020. That shift makes product selection less about choosing an LED and more about checking its performance in context. Look beyond wattage: compare delivered lumens, beam angle, color rendering, color temperature, glare control, dimming compatibility, and driver access. DOE data provides useful market context, but it cannot tell you how a fitting will look above your specific counter or workbench. A mock-up can.
Even a tidy specification sheet can miss the room’s real needs. A high lumen output may sound impressive, but it can create harsh contrast on a glossy floor. Maintenance matters, too: a fitting that is difficult to reach may turn a simple driver replacement into an expensive interruption. The right choice balances light quality, energy use, durability, and installation constraints. This guide presents 10 practical tips for choosing Commercial Downlights, with attention to both the numbers and the space people actually use.
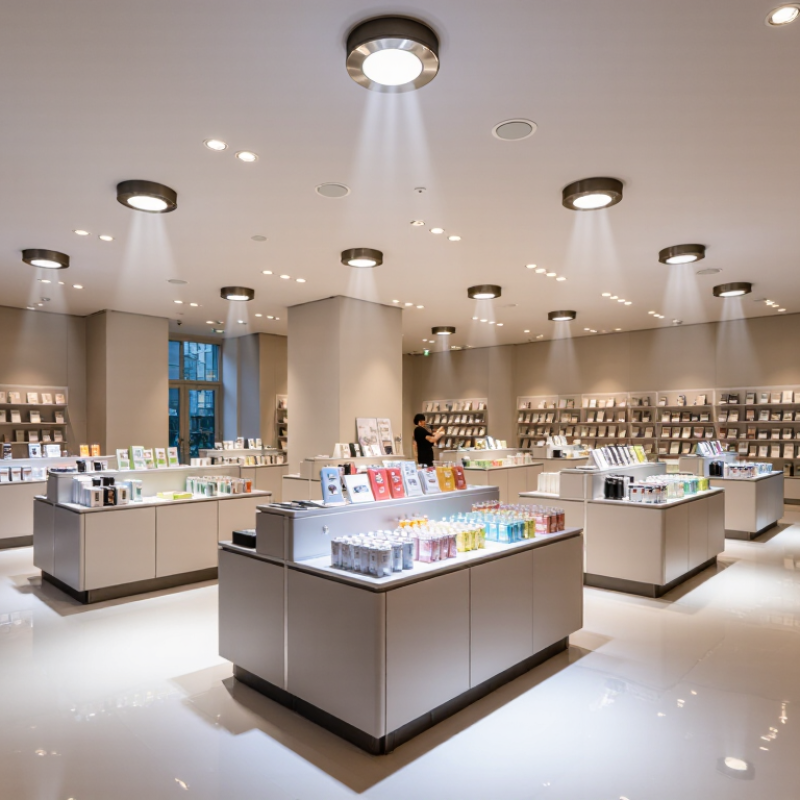
Assess the room before choosing commercial downlights. A narrow corridor, a stocked shelf, and a computer desk need different beam spreads and light levels. Measure the working plane, usually the desk or counter, rather than judging brightness from the floor. Note ceiling height, surface colors, daylight, and likely shadows. Dark finishes absorb more light. A glossy counter may create glare.
Tip: List each task and its location. EN 12464-1:2021 gives 500 lux maintained illuminance as a reference for office reading, writing, and typing. Treat that as a starting point, not a universal target. A reception counter, meeting table, and circulation route may need different levels. Check the standard’s uniformity and glare criteria, too.
The IES Lighting Handbook also considers visual task, contrast, and viewing conditions when setting lighting criteria. Use these factors to estimate fixture spacing and beam angle; then confirm the result with a lighting calculation or on-site measurements.
Dimming can help when daylight changes, but it cannot fix poor placement. A neat plan can still feel harsh. Review the space at working hours, when screens, windows, and real tasks reveal what the drawing missed.
Tip: Match the downlight type to the ceiling. Recessed fixtures suit clean, unobtrusive layouts, while surface-mounted models can work beneath concrete slabs. For renovations, check whether the existing cutout and wiring support a retrofit fitting. A neat-looking fixture is not automatically the easiest one to install.
Tip: Measure the opening, not just the visible trim. Common cutout sizes vary, so compare the fitting’s cutout diameter with the ceiling hole before ordering. Also check ceiling depth and insulation clearance. A few millimeters can matter. If the ceiling is shallow, confirm the fitting’s required installation space rather than guessing.
Tip: Choose beam angle for the task and room layout. A narrow beam can highlight a reception desk or display, but may create bright spots on the floor. A wider beam spreads light across corridors and open offices. For example, higher ceilings often need more careful beam planning to avoid dim patches. Test a sample if possible; room finishes can change how light feels. I have seen a technically suitable angle look harsher than expected against glossy flooring. Consider glare, spacing, and the actual work surface together.
Typical starting points for commercial applications
Narrower beams concentrate light for displays and accents, while wider beams provide broader coverage for offices and retail areas. Treat these values as planning starting points: the right beam angle depends on ceiling height, fixture spacing, and the desired lighting effect.
Commercial downlights should be judged by usable light, not wattage alone. Check lumen output and beam angle against ceiling height, room size, and the task. A narrow beam can brighten a counter while leaving nearby shelves dim. Review the lighting plan and compare expected illuminance with the space’s needs. Numbers need context. A walk-through can reveal glare or dark corners that a specification sheet misses.
Color quality affects how products, finishes, and food appear. A higher CRI can help colors look more natural, but test actual samples under the proposed light. Choose a consistent color temperature across adjoining areas; mixed tones may look untidy. For efficiency, compare lumens per watt at the intended setting, not only at full output. Sensors and dimming may save energy when properly commissioned. Still, an efficient fitting can feel harsh in a small room. Test a sample. It takes extra time, but may prevent a costly mismatch.
Before ordering commercial downlights, match the fitting to the actual ceiling and electrical system. Check the cutout diameter, ceiling depth, supply voltage, and driver type. Dimming is a common snag: a phase-cut dimmer may not work with a 0–10V driver. Check the driver. A drawing can look complete yet omit a shallow plenum, awkward joist, or existing control system. Verify dimensions on site, not only on plans.
Safety ratings must fit the location and ceiling construction. Use the correct IC rating where insulation may touch the housing, and confirm any airtightness requirement for the assembly. Damp or wet areas need fixtures rated for those conditions. For fire-rated ceilings, verify that the proposed installation preserves the assembly’s required performance. The U.S. Department of Energy’s 2020 Lighting Market Characterization estimated LEDs represented about 48% of installed U.S. lighting stock, so mixed-source retrofits remain a practical compatibility concern. Small mismatches matter.
Plan access before installation. Leave room to connect and service the driver, and check whether emergency lighting or controls affect wiring. The U.S. Energy Information Administration’s 2018 Commercial Buildings Energy Consumption Survey attributed about 17% of commercial building energy use to lighting. That makes efficient selection worthwhile, but efficiency figures alone do not prove a fitting suits a specific site. Have a qualified electrical professional check the circuit, protection, and local installation requirements. I’d treat product schedules as a starting point, not proof that every ceiling condition has been checked.
Choosing commercial downlights means looking beyond the purchase price. A long rated lifespan can reduce replacements, but real performance depends on operating hours, heat, dimming, and installation conditions. Ask how the lifespan figure was tested and what light output remains at that point. Numbers need context. A fitting above a high ceiling may cost more to service than one in an accessible office.
Compare total cost of ownership over a realistic period, such as five or ten years. Include energy use, replacement fittings, labor, access equipment, and disposal. Check whether drivers can be replaced separately; replacing an entire fitting for one failed component can add avoidable expense. Maintenance plans should also account for cleaning and periodic checks, especially in dusty areas. A spreadsheet helps, but it can miss disruption: even a quick repair may interrupt work in a busy corridor. Compare warranty terms, compatible controls, and spare-part availability, then test a small group of fittings before specifying them across a whole building. A pilot may reveal glare or maintenance issues that a datasheet cannot.
„Thanks to the LUVIR technology, the solder resist process could be switched directly from the previously used mask exposure to direct exposure. As an outstanding digital solution on the market, this technology has been able to demonstrate fast process times and superior quality on our certified conventional ink in production. This allowed us to fully digitize the solder mask process at low cost – without process or ink adjustments. An excellent benefit to our production in Rot am See.“
Ralf Göhringer (Head of Production WE Rot am See)
I would definitely recommend the Limata machine and team for a future company purchase
Michael Greenaway
Compunetics Inc.
“The Limata ldi has been amazing!! Best thing we did was buy this machine”
Richard Brady
GM
Circuitlabs
“Since 2019, we have been running the Limata X1000 LDI system (including LUVIR for solder mask imaging) in daily production as an addition to our current process with film. The machine was capable of properly exposing Taiyo PSR-4000 BN (DI) solder mask types on normal to high-copper boards using a new and unique direct imaging process. The machine operating interface is very user friendly which allowed for a quick technical training curve. The pre-registration processing reduced several seconds of production time at every print. Limata support and service staff is incomparable. They supported our team every step of the way at basically any time of the day or night, with literally, an immediate response time, customizing the software interface to best fit our Operations and needs.
We have exposed more than 8,000 prints since end of October, on various solder mask colors and some resist film panels. Limata, has proven to be very capable and innovative. They are a strong contender in the industry.
We have very much enjoyed this project, and working with the team!
Thank you Limata for the continued support and being a part of our growth.”
Bill Sezate
Vice President, GM
Summit Interconnect
As a replacement to our current contact exposure process with film, the LIMATA X2000 system including LUVIR-Technology was capable of properly exposing non-LDI solder mask types using a direct imaging process. The machine offers cutting edge software with a very intuitive operating interface which allowed for quick technician training curve. The dual drawer system combined with pre-registration processing reduced several seconds of production time at every machine cycle. Limata support and service staff is world class. They added software patches to keep production running at shortest possible response times, customized the software interface to best fit our in-house Operations system, and even wrote a step-by-step machine processing manual. As a result of the project, we have exposed more than 16,000 times on various product types and solder mask brands/colors. Limata, in a very short timeframe as a company, has definitely shown they are truly innovative and will be challenging the industry of direct imaging for the top spot.
Kevin Beattie
Process Engineer
TTM Technologies
Forest Grove Division