Choosing the best Field Fence for your farm is not simply a matter of comparing wire height and price. The right fence must match your animals, terrain, climate, and daily working habits. A fence that holds quiet sheep may fail under restless cattle. A design that works on level pasture may sag across rocky ground. Small details matter, including mesh spacing, wire gauge, post strength, and gate placement.
Temple Grandin, a leading livestock-handling specialist, has stated, “Good fencing is the key to good stockmanship.” Her observation reflects a practical truth. Reliable fencing reduces animal stress, limits escapes, and makes routine handling safer. It also saves time when checking boundaries after storms or moving livestock between fields. Before buying, walk the proposed fence line. Notice wet soil, sharp slopes, fallen branches, and areas where animals gather. These details often reveal problems that product brochures cannot show.
No fence is perfect. That deserves honest attention. A heavier Field Fence may offer better durability, but it can cost more and require stronger posts. Smaller openings improve security for young animals, yet they may complicate repairs. Electric strands can strengthen a boundary, although they need regular testing and vegetation control. The best decision balances protection, maintenance, budget, and future farm plans. This guide explains the key choices clearly, while recognizing that local conditions may challenge even a well-researched plan. Expect a few adjustments. Good fencing is built through careful observation, sound materials, and practical experience.
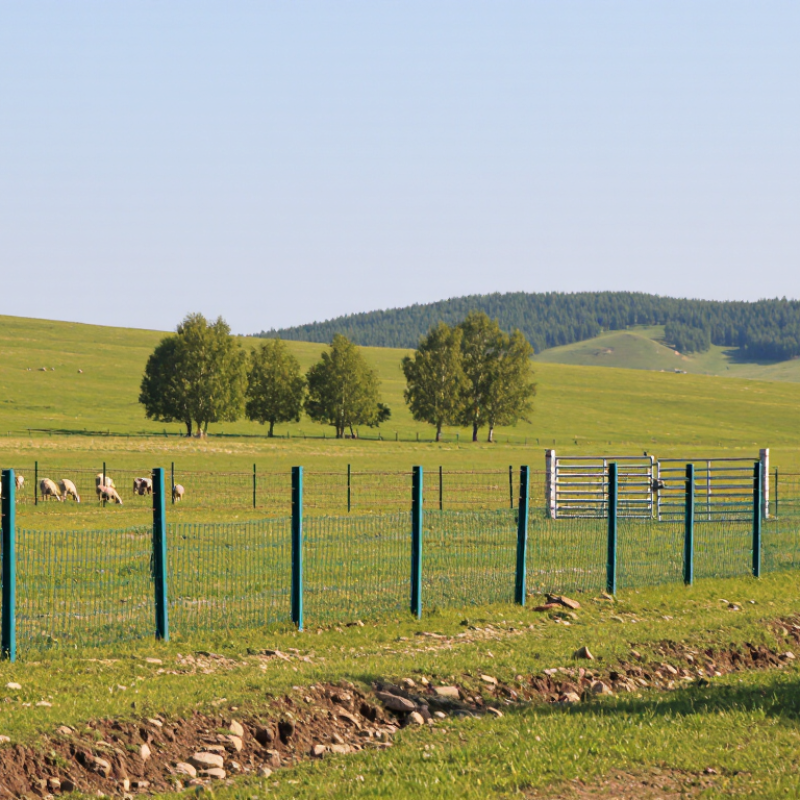
How to Choose the Best Field Fence for Your Farm?
Define livestock, predator, and boundary risks before choosing fence. Start with livestock. Cattle may lean against wire, while horses can panic near loose strands. Goats test small gaps with surprising patience. Calves and lambs also require closer spacing than mature animals. Walk the pasture and mark muddy corners, worn trails, and places where animals gather.
Predators test weakness. Look for tracks beneath gates, disturbed soil, and bent lower wires. A fence designed for large livestock may not stop smaller predators. Consider whether the threat comes from digging, climbing, or squeezing through openings. Electric support wires can add protection, but they need regular checks and safe installation. Do not rely on height alone.
Boundary risks deserve equal attention. Public paths, neighboring animals, steep slopes, and seasonal flooding can damage an otherwise suitable fence. Strong posts matter more where soil becomes soft after rain. Keep gates visible from the house when possible. That improves daily inspection and reduces forgotten openings. In practice, the cheapest fence is not always economical. Replacing one broken section can cost more than choosing stronger materials initially. Still, overbuilding every field may waste money. I would reassess each boundary separately, because farm conditions rarely behave perfectly.
How to Choose the Best Field Fence for Your Farm?
Field fence performance depends on wire gauge, fence height, and mesh opening. Lower gauge numbers usually indicate thicker wire, but confirm the actual diameter before ordering. A heavier 12.5-gauge line wire can resist pressure from cattle and repeated weather exposure. Lighter 14-gauge wire may suit temporary areas or smaller livestock, though it can deform more easily.
Height should match both the animals and the terrain. A 36-inch fence may contain sheep on level ground, while 48 inches offers better control around cattle and uneven pasture. A 60-inch fence can discourage jumping animals or protect boundaries near wooded areas. Measure slopes carefully. A fence that looks tall at the gate may leave gaps on a hillside.
Mesh openings require closer attention than many buyers expect. Two-inch openings improve safety for young goats, lambs, and curious dogs. Four-inch mesh offers a useful balance for mixed livestock. Six-inch openings work for larger cattle, but smaller animals may push their heads through. That can create injuries and damaged wire. No specification is perfect. I would inspect the smallest animal first, then consider the strongest one. Also check knot strength, vertical stay spacing, and coating quality. These details often matter more than a promising product label. A short sample installation can reveal sagging, awkward tension, or unexpected ground gaps before the full fence is built.
| Fence configuration | Nominal mesh opening | Common height | Typical wire gauge | Best suited for | Main advantages | Important limitations |
|---|---|---|---|---|---|---|
| Small-mesh livestock fence | 2 in × 4 in | 48–60 in | 12.5–14 gauge | Sheep, goats, young livestock, and mixed small-animal areas | Reduces head and leg entanglement compared with larger openings; provides strong animal containment | Uses more wire and is usually more expensive and heavier to install than large-mesh fencing |
| Standard field fence | 4 in × 4 in | 48–60 in | 12.5–14 gauge | Cattle, horses, and general-purpose farm perimeter fencing | Balanced visibility, containment, material use, and installation effort | May not adequately contain very small animals or young goats without additional small-mesh sections |
| Large-mesh field fence | 6 in × 6 in | 48–60 in | 12.5–14 gauge | Adult cattle, pasture division, and low-pressure boundary fencing | Lower wire consumption, good visibility, and relatively efficient installation | Larger openings can allow smaller animals to pass through or become caught |
| Heavy-duty woven-wire fence | 2–4 in × 4 in | 48–60 in | 12.5 gauge | High-pressure livestock areas, active cattle runs, and long-term perimeter fencing | Thicker wire generally offers greater resistance to impact, stretching, and handling damage | Higher purchase cost and greater weight; requires well-braced end and corner assemblies |
| Economy woven-wire fence | 4–6 in × 4–6 in | 36–48 in | 14– Gauge | Temporary divisions, light-duty boundaries, and areas with low animal pressure | Lower material weight and simpler handling for short-term or low-stress applications | More vulnerable to bending and stretching; not ideal for forceful livestock or predator control |
| Tall horse and livestock fence | 2–4 in × 4 in | 60 in | 12.5–14 gauge | Horses, larger livestock, and fields where jumping or leaning is a concern | Additional height improves visual boundary recognition and reduces the chance of animals going over the fence | Requires taller posts, more labor, and careful top-edge finishing in horse areas |
| Low pasture divider | 4–6 in × 4–6 in | 36–42 in | 12.5–14 gauge | Internal cattle grazing divisions and low-pressure pasture management | Uses less material and can be faster to install than a tall perimeter fence | Not suitable where animals may jump, climb, push heavily, or where small livestock must be contained |
Choosing the best field fence starts with your animals, soil, and maintenance routine. On working farms, I inspect gateways, slopes, and corners before selecting wire. High-tensile steel holds its shape under pressure and resists long-term stretching. It suits permanent boundaries and areas where livestock push against the mesh. However, it needs accurate tensioning and well-anchored posts. Poor installation can make strong wire perform badly.
Low-carbon steel is easier to bend and install around uneven ground. It can work well for lighter livestock, temporary divisions, or frequent layout changes. Yet, it stretches more quickly and may require regular retensioning. That extra labor is easy to underestimate. I once selected a softer wire for a busy pasture, and the lower installation effort did not offset later adjustments.
A 12.5-gauge specification provides a useful comparison point, but gauge labels can vary between suppliers and regions. Confirm the actual wire diameter, tensile strength, coating, and test documentation. Do not judge quality by gauge alone. For high-tensile wire, check whether the posts and brace assemblies match its load. For low-carbon wire, examine welds, knots, and coating coverage closely. Measure the fence line before ordering. A few extra rolls may prevent awkward joins, but excessive waste signals poor planning.
Choosing a field fence starts with the land, not the wire. For many farms, line posts work well at 10–12-foot intervals. Twelve feet may suit level, firm ground with moderate livestock pressure. Ten feet provides extra support where animals push or the fence carries heavier wire. Shorter spacing can reduce sag, but it also increases labor and material costs.
Walk the proposed fence line before purchasing supplies. Inspect it after rain if possible. Soft soil, shallow rock, steep slopes, and drainage channels can change your post plan. Slopes may need closer spacing and stronger bracing at direction changes. Wet ground may require deeper installation or a different post-setting method. Local frost depth and agricultural guidance also deserve attention.
Corners and gates carry the greatest strain. Set them securely before measuring line posts. Use a string line to reveal unexpected curves and low spots. Keep enough clearance for equipment and animals. I once underestimated a shallow dip, and the finished fence allowed livestock to press beneath it. That mistake was avoidable. Do not treat 10 feet as a universal answer. Test a short section, observe the wire under tension, and adjust spacing before completing the entire boundary.
How to Choose the Best Field Fence for Your Farm?
Measure the complete perimeter before ordering field fence. Add each straight run, then include corners, curves, and gate openings. For example, a 1,200-foot perimeter with a 16-foot gate needs 1,184 feet of fence. A five percent allowance adds 59 feet, requiring about 1,243 feet. Divide this figure by the roll length before purchasing. Rounding up prevents a short final section. My first estimate was too tidy. Uneven ground created extra cutting and tensioning.
Gate placement affects both cost and daily labor. Position gates near lanes, water points, and loading areas, but avoid low spots where mud weakens access. Track posts, staples, equipment hours, and repairs separately. Then divide annual maintenance spending by enclosed acres. USDA NASS reported 880.1 million U.S. farm acres across nearly 1.9 million farms in the 2022 Census of Agriculture. Large properties can reduce cost per acre, while small fields often carry higher travel and setup costs. USDA NRCS Conservation Practice Standard 382 also emphasizes site conditions, livestock pressure, terrain, and intended service life when designing fences.
Tips: Sketch the boundary on paper first. Mark every gate and corner. Measure twice. Compare at least two roll sizes. Photograph damaged sections after storms. Review repair records each season, even when the numbers look minor. A loose wire today may become a full replacement later.
„Thanks to the LUVIR technology, the solder resist process could be switched directly from the previously used mask exposure to direct exposure. As an outstanding digital solution on the market, this technology has been able to demonstrate fast process times and superior quality on our certified conventional ink in production. This allowed us to fully digitize the solder mask process at low cost – without process or ink adjustments. An excellent benefit to our production in Rot am See.“
Ralf Göhringer (Head of Production WE Rot am See)
I would definitely recommend the Limata machine and team for a future company purchase
Michael Greenaway
Compunetics Inc.
“The Limata ldi has been amazing!! Best thing we did was buy this machine”
Richard Brady
GM
Circuitlabs
“Since 2019, we have been running the Limata X1000 LDI system (including LUVIR for solder mask imaging) in daily production as an addition to our current process with film. The machine was capable of properly exposing Taiyo PSR-4000 BN (DI) solder mask types on normal to high-copper boards using a new and unique direct imaging process. The machine operating interface is very user friendly which allowed for a quick technical training curve. The pre-registration processing reduced several seconds of production time at every print. Limata support and service staff is incomparable. They supported our team every step of the way at basically any time of the day or night, with literally, an immediate response time, customizing the software interface to best fit our Operations and needs.
We have exposed more than 8,000 prints since end of October, on various solder mask colors and some resist film panels. Limata, has proven to be very capable and innovative. They are a strong contender in the industry.
We have very much enjoyed this project, and working with the team!
Thank you Limata for the continued support and being a part of our growth.”
Bill Sezate
Vice President, GM
Summit Interconnect
As a replacement to our current contact exposure process with film, the LIMATA X2000 system including LUVIR-Technology was capable of properly exposing non-LDI solder mask types using a direct imaging process. The machine offers cutting edge software with a very intuitive operating interface which allowed for quick technician training curve. The dual drawer system combined with pre-registration processing reduced several seconds of production time at every machine cycle. Limata support and service staff is world class. They added software patches to keep production running at shortest possible response times, customized the software interface to best fit our in-house Operations system, and even wrote a step-by-step machine processing manual. As a result of the project, we have exposed more than 16,000 times on various product types and solder mask brands/colors. Limata, in a very short timeframe as a company, has definitely shown they are truly innovative and will be challenging the industry of direct imaging for the top spot.
Kevin Beattie
Process Engineer
TTM Technologies
Forest Grove Division