Choosing an Elevator Guide Rail Bracket in 2026 is not a catalog-only decision. The bracket must suit the rail profile, building structure, elevator duty, and installation conditions. A mismatch can show up as uneven spacing, difficult alignment, or vibration that becomes noticeable during a ride. Small parts matter.
A reliable selection starts with verified project information: rail dimensions, expected loads, fixing method, substrate strength, and the manufacturer’s installation requirements. Check bracket material, finish, adjustment range, and compatibility with the specified anchors. On site, a bracket may meet a concrete wall, a steel support, or a surface with limited clearance. Those details can change the choice. So can local environmental conditions, such as moisture in a service area.
This introduction does not assign a quotation to a named elevator specialist because no verifiable source was supplied. Inventing an expert’s words would undermine the reliability this guide should provide. Instead, the guide focuses on evidence readers can check: drawings, product data, engineering review, and installation instructions. Ask for documented load capacity, not just a confident sales claim. Then confirm that the selected assembly fits the actual structure and rail system.
There is no universal bracket. The right choice is the one supported by project-specific evidence and checked by qualified professionals. Even a careful selection deserves a second look before installation.
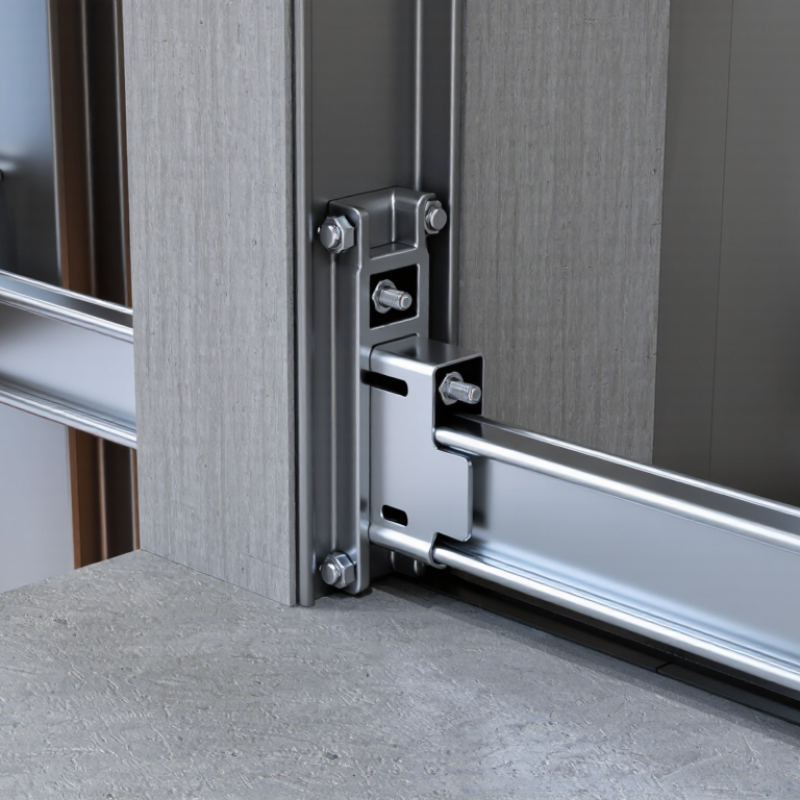
Choosing elevator guide rail brackets in 2026 starts with three inputs: rated load, car speed, and guide-rail forces. Record rated load in kilograms, including the car’s own mass and the intended passenger or goods load. Check the actual car and counterweight arrangement. Keep units consistent. Small errors matter.
Speed, measured in metres per second, affects dynamic forces during travel and stopping. But speed alone does not determine bracket capacity. The design must account for forces transferred to the rails by the car, counterweight, and safety gear, including uneven loading or an emergency stop. Use project calculations and applicable engineering data rather than guessing from a load rating. A tidy spreadsheet can still miss a real condition.
Next, confirm how those forces reach each bracket. Rail section, bracket spacing, fixings, and the supporting wall or structure all influence the result. Ask the elevator designer or qualified engineer to verify the specified loads and anchorage for the actual installation. Check that drawings match site conditions, especially where the structure changes or space is tight. I would not treat a standard spacing as universal; that assumption deserves a second look. A secure fit starts with verified inputs, not a bracket chosen by appearance.
Match Rail Profiles and T-Section Dimensions to ISO 7465:2007
Choose a bracket only after identifying the rail’s exact profile and T-section dimensions. ISO 7465:2007 defines guide-rail profiles and dimensional requirements; check the applicable rail drawing rather than relying on a label alone. Measure the rail height, head width, and stem dimensions, then compare them with the bracket’s clamping range and fixing-hole layout. A few millimetres matter. A tight clamp can distort alignment, while excess clearance may allow movement under load. One detail is easy to overlook: the bracket must also suit the supporting structure and the installation’s specified loads.
The market context is growing: Grand View Research estimated the global elevator and escalator market at USD 88.59 billion in 2023, with a projected 6.3% CAGR through 2030. That figure does not determine bracket dimensions, but it points to varied new-build and modernization requirements. Record the rail designation, measured dimensions, bracket spacing, and source drawing. I still double-check older site measurements; drawings and installed parts do not always agree.
Tips: Use calipers on a clean rail section. Confirm bolt spacing and clamp clearance before ordering. If the profile is uncertain, pause and verify it against ISO 7465:2007 and the project engineer’s specification.
How to Choose Elevator Guide Rail Brackets in 2026?
Set bracket spacing by calculation, not by a familiar site rule. EN 81-20:2020 requires guide rails and their fixings to withstand applicable loads while keeping deflection within permitted limits. EN 81-50:2020 provides calculation and examination methods for lift components. CIBSE Guide D also treats vertical-transport design as a system problem: rail behavior depends on the car, counterweight, guides, and supporting structure. There is no safe universal spacing for every installation.
Check the rail’s section properties, car and counterweight masses, rated load, safety-gear forces, bracket stiffness, and anchorage substrate. Then assess rail strength and deflection for relevant loading cases, including uneven loading where applicable. Use the resulting forces to set bracket spacing and specify fixings for the actual wall or shaft steel. A neat, even layout can still be wrong. Site tolerances matter, too; imperfect concrete can change the support conditions.
Tips: Keep a calculation sheet. Record assumptions, rail data, bracket locations, and anchor details. Check the installed spacing against the approved design, then review any change with a qualified lift engineer.
Elevator guide rail brackets must match both the rail system and the shaft substrate. Start by confirming the bracket loads, spacing, and adjustment range in the project design. Then inspect the actual wall or frame where each fixing will sit. Concrete, structural steel, and masonry need different anchoring approaches. A bracket that fits neatly on paper may not suit an uneven shaft wall.
Choose bracket steel for the specified loads and site conditions, not appearance alone. Check the material, thickness, finish, and exposure to moisture. Anchors must be suitable for the substrate and installed with the required embedment and edge distances. Do not guess. Dust, cracked concrete, hollow sections, and weak joints can reduce fixing reliability. On site, record substrate variations and refer uncertain conditions to the responsible elevator engineer. One detail is easy to miss: a strong anchor cannot compensate for a poor load path.
Tips: Keep a sample anchor and bracket nearby during the substrate check. Confirm hole positions, drilling depth, and tightening requirements against approved project documents. Remove drilling dust as instructed, and avoid forcing a bracket into alignment. Small gaps can matter. If the wall differs from the drawings, pause and verify the fixing design before installation.
A guide rail bracket should hold the rail steady without forcing it out of line. Check the rail centerline, plumb, and spacing at several heights, not just near the landing. A laser or plumb line can reveal drift; feeler gauges help check whether contact surfaces sit flat. Small errors matter. A bracket tightened against a twisted surface may pull the rail out of alignment.
Corrosion exposure changes the choice of material and finish. Look for condensation, cleaning chemicals, coastal salt, and water near pits or machine rooms. Inspect welds, fasteners, and cut edges, where protective coatings may be thin or damaged. Stainless steel is not automatically the right answer; material compatibility and the surrounding environment still matter. A tidy specification can miss a damp corner. Check actual site conditions before ordering.
Seismic design requires more than a stronger-looking bracket. Confirm expected movement, rail loads, anchorage, and connection details against the project’s engineering documents and applicable requirements. Bracket spacing and fastener embedment can affect how loads travel into the building structure. Do not assume a standard detail suits every shaft. If calculations or drawings leave a gap, ask the responsible engineer to resolve it before installation. A little extra checking now can prevent a difficult field correction later.
Use corrosion exposure alongside rail alignment checks and the seismic requirements that apply to the project. The chart shows ISO 9223:2012 atmospheric corrosivity categories for carbon steel; values are first-year corrosion-rate upper boundaries, not predicted bracket service life.
Specify bracket material and protective finish to suit the site exposure. Separately verify guide-rail alignment against the applicable elevator code and manufacturer requirements, and confirm bracket and anchorage design for the project’s seismic conditions.
„Thanks to the LUVIR technology, the solder resist process could be switched directly from the previously used mask exposure to direct exposure. As an outstanding digital solution on the market, this technology has been able to demonstrate fast process times and superior quality on our certified conventional ink in production. This allowed us to fully digitize the solder mask process at low cost – without process or ink adjustments. An excellent benefit to our production in Rot am See.“
Ralf Göhringer (Head of Production WE Rot am See)
I would definitely recommend the Limata machine and team for a future company purchase
Michael Greenaway
Compunetics Inc.
“The Limata ldi has been amazing!! Best thing we did was buy this machine”
Richard Brady
GM
Circuitlabs
“Since 2019, we have been running the Limata X1000 LDI system (including LUVIR for solder mask imaging) in daily production as an addition to our current process with film. The machine was capable of properly exposing Taiyo PSR-4000 BN (DI) solder mask types on normal to high-copper boards using a new and unique direct imaging process. The machine operating interface is very user friendly which allowed for a quick technical training curve. The pre-registration processing reduced several seconds of production time at every print. Limata support and service staff is incomparable. They supported our team every step of the way at basically any time of the day or night, with literally, an immediate response time, customizing the software interface to best fit our Operations and needs.
We have exposed more than 8,000 prints since end of October, on various solder mask colors and some resist film panels. Limata, has proven to be very capable and innovative. They are a strong contender in the industry.
We have very much enjoyed this project, and working with the team!
Thank you Limata for the continued support and being a part of our growth.”
Bill Sezate
Vice President, GM
Summit Interconnect
As a replacement to our current contact exposure process with film, the LIMATA X2000 system including LUVIR-Technology was capable of properly exposing non-LDI solder mask types using a direct imaging process. The machine offers cutting edge software with a very intuitive operating interface which allowed for quick technician training curve. The dual drawer system combined with pre-registration processing reduced several seconds of production time at every machine cycle. Limata support and service staff is world class. They added software patches to keep production running at shortest possible response times, customized the software interface to best fit our in-house Operations system, and even wrote a step-by-step machine processing manual. As a result of the project, we have exposed more than 16,000 times on various product types and solder mask brands/colors. Limata, in a very short timeframe as a company, has definitely shown they are truly innovative and will be challenging the industry of direct imaging for the top spot.
Kevin Beattie
Process Engineer
TTM Technologies
Forest Grove Division