Choosing the right Hdpe Liner in 2026 begins with understanding the job it must perform. A liner for a farm pond faces different demands from one used in a landfill, reservoir, or mining operation. Site conditions matter. Soil movement, slope, sunlight, liquid chemistry, and installation access can all affect performance. A product that looks suitable on paper may not fit the actual site. That sounds simple. It rarely is.
This guide explains how to compare liner thickness, resin quality, panel dimensions, seam strength, and installation requirements. It also considers practical details, such as whether the rolls can reach the site and how seams will be tested. Ask suppliers for technical data sheets, quality-control records, and clear information about manufacturing standards. Then check that the proposed specifications match the project’s design and operating conditions. Price matters, but a lower initial cost may bring difficult installation or earlier maintenance. There is no universal “best” liner. Even experienced teams can overlook a site-specific constraint, so independent review is worthwhile. The aim is to make the trade-offs visible before purchasing, not to promise a perfect outcome.
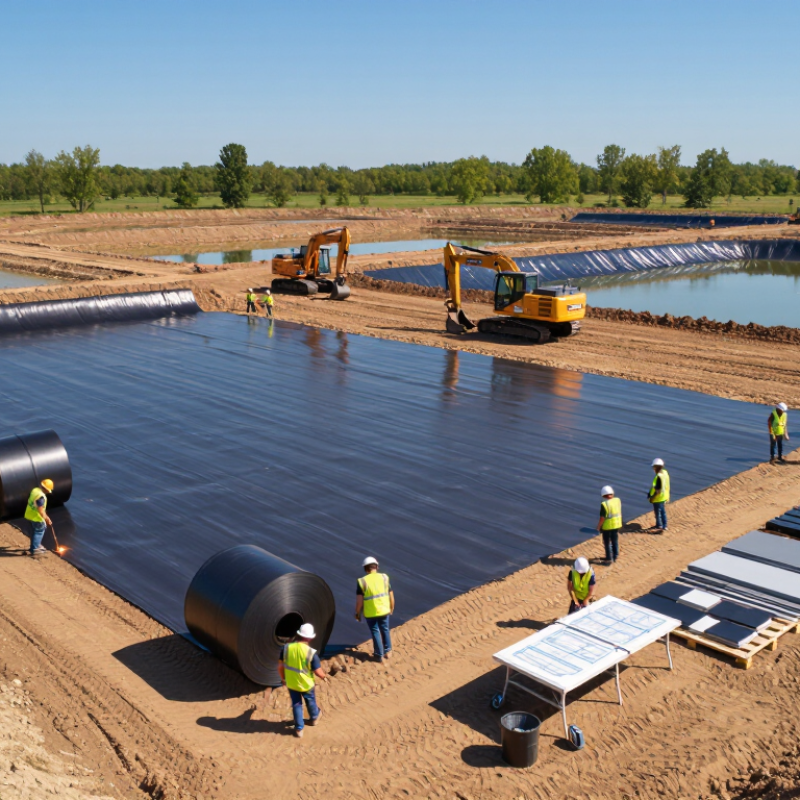
Before comparing HDPE liner thicknesses, define what the barrier must contain and for how long. List the liquid’s chemistry, expected temperature range, sunlight exposure, and contact duration. Record hydraulic head, slope, subgrade condition, and construction traffic. A sharp stone under a loaded track may matter more than a catalog value. Small details matter.
The Geosynthetic Institute’s GRI-GM13 specification gives practical screening benchmarks for HDPE geomembranes. It specifies 2.0–3.0% carbon black and a minimum standard oxidation induction time (OIT) of 100 minutes. These values help assess formulation and antioxidant reserve, but they do not predict service life on their own. Request current, lot-specific test results rather than relying only on a generic product sheet.
Match resin and thickness to measured chemical exposure, temperature, stress, and installation method. Treat seams and penetrations as design details, not afterthoughts. For aggressive liquids, request compatibility testing and review the findings with a geosynthetics engineer. Revisit assumptions after a site walk: plans may miss a wet pocket, uneven grade, or late change to equipment access. That can affect the specification.
Indicative HDPE liner mass per square metre at three commonly specified thicknesses
How to use this: Greater thickness adds material mass, but thickness alone does not determine suitability. Select a liner based on the contained substance, temperature, installation conditions, subgrade, and expected mechanical stresses. Estimates use an assumed density of 0.95 g/cm³; actual product values vary.
Choosing an HDPE liner starts with the site, not the catalog. Thickness influences puncture resistance, flexibility, handling, and cost. A thinner sheet may work on a smooth, carefully prepared pond base. Rough ground, sharp aggregate, or frequent equipment access may call for a thicker liner or protective geotextile. There is no universal best thickness. Match the specification to the soil, stored material, slope, and installation plan. Small details matter.
Resin quality affects how a liner performs over time. Ask for traceable production records and test data relevant to the intended use. Review properties such as tensile strength, stress-crack resistance, and oxidation-induction time. Carbon black dispersion and consistent sheet quality also matter, especially where sunlight exposure is expected. Do not judge quality by thickness alone. A thick sheet made with inconsistent material is not automatically the safer choice.
Performance depends on installation as much as the sheet itself. Poorly prepared ground can create stress points, while weak seams can become leak paths. Check that the crew’s welding procedures and seam testing suit the project conditions. Temperature, wind, and moisture can affect field work. Even a sound specification cannot prevent every installation mistake. In practice, comparisons are not perfectly neat; site conditions can change, and that should prompt a careful review rather than a guess.
Choosing an HDPE liner in 2026 starts with the ground beneath it, not the catalog photo. Smooth liners suit many applications with prepared, stable subgrades. Textured surfaces can increase interface friction on slopes or beneath cover soil. But texture cannot compensate for a weak base. A few sharp stones can still cause trouble. For sloped areas, review shear data for the actual soil, geotextile, and liner combination; texture alone cannot predict stability. Check samples in daylight.
Panel design matters just as much. Large panels can reduce total seam length, yet wind, limited access, and irregular corners may make them difficult to place. Smaller panels can fit around sumps and narrow benches, but create more seams to weld and inspect. Walk the site with the installer before confirming the layout. Mark anchor trenches, drains, penetrations, and equipment routes on the drawings. Field measurements are often less tidy than plans suggest. Allow space for trial seams, repairs, and temperature-related movement. That detail is easy to miss. Specify resin quality, thickness, and testing alongside texture and panel size, so the liner matches both site conditions and installation capabilities.
A good HDPE liner starts with the project conditions, not thickness alone. Identify the stored material, expected temperatures, subgrade conditions, and likely exposure to sunlight. Then compare the liner specification with recognized test methods, such as GRI-GM13 and relevant ASTM procedures. Confirm which edition and requirements apply to your project. A standard is useful only when its tests match real service conditions. Small details matter.
Review more than tensile strength. Ask for documented results on stress-crack resistance, puncture, tear, and carbon black content. Check that the specified thickness suits the site’s risks, including sharp stones or frequent access. I would not treat a thicker sheet as automatically safer; poor support beneath it can still cause damage. No checklist removes every risk.
Installation can determine whether a sound liner performs well. The prepared surface should be smooth, compacted, and free of roots, debris, and standing water. Qualified crews should use suitable fusion-welding procedures and record seam locations and test results. Weather matters: wind, dust, and cold can complicate welding. After placement, inspect seams and repair verified defects before covering the liner. For long-term durability, assess chemical compatibility, UV exposure, drainage, and expected movement from temperature changes. Keep inspection records, and revisit assumptions when site conditions change.
Evaluate Suppliers, Warranties, and Total Lifecycle Cost
Compare suppliers on more than price per square metre. Request resin and production-batch records, independent test results, installation references, and a clear quality-control plan. Check that proposed material properties meet the project specification and relevant GRI-GM13 requirements. A warranty matters, but read its exclusions: installation damage, chemical exposure, and maintenance duties may affect coverage. Ask who handles claims and what evidence is required. Get the answer in writing.
Lifecycle cost includes more than the liner. Add transport, subgrade preparation, welding inspections, repairs, and likely replacement costs. The Geosynthetic Institute’s GRI White Paper No. 6 models HDPE geomembrane service life at about 446 years at 20°C, versus about 90 years at 40°C. These are model estimates, not guarantees; actual performance depends on exposure, material, and installation. Small details matter. A hot, exposed site can change the calculation.
Tips: Compare at least three itemized bids. Ask for seam-test records and a sample warranty claim process. Then check whether the lowest bid still looks low after freight, testing, and maintenance are included. It may not. Also, project cost estimates are imperfect: service conditions and future repair access are easy to underestimate.
„Thanks to the LUVIR technology, the solder resist process could be switched directly from the previously used mask exposure to direct exposure. As an outstanding digital solution on the market, this technology has been able to demonstrate fast process times and superior quality on our certified conventional ink in production. This allowed us to fully digitize the solder mask process at low cost – without process or ink adjustments. An excellent benefit to our production in Rot am See.“
Ralf Göhringer (Head of Production WE Rot am See)
I would definitely recommend the Limata machine and team for a future company purchase
Michael Greenaway
Compunetics Inc.
“The Limata ldi has been amazing!! Best thing we did was buy this machine”
Richard Brady
GM
Circuitlabs
“Since 2019, we have been running the Limata X1000 LDI system (including LUVIR for solder mask imaging) in daily production as an addition to our current process with film. The machine was capable of properly exposing Taiyo PSR-4000 BN (DI) solder mask types on normal to high-copper boards using a new and unique direct imaging process. The machine operating interface is very user friendly which allowed for a quick technical training curve. The pre-registration processing reduced several seconds of production time at every print. Limata support and service staff is incomparable. They supported our team every step of the way at basically any time of the day or night, with literally, an immediate response time, customizing the software interface to best fit our Operations and needs.
We have exposed more than 8,000 prints since end of October, on various solder mask colors and some resist film panels. Limata, has proven to be very capable and innovative. They are a strong contender in the industry.
We have very much enjoyed this project, and working with the team!
Thank you Limata for the continued support and being a part of our growth.”
Bill Sezate
Vice President, GM
Summit Interconnect
As a replacement to our current contact exposure process with film, the LIMATA X2000 system including LUVIR-Technology was capable of properly exposing non-LDI solder mask types using a direct imaging process. The machine offers cutting edge software with a very intuitive operating interface which allowed for quick technician training curve. The dual drawer system combined with pre-registration processing reduced several seconds of production time at every machine cycle. Limata support and service staff is world class. They added software patches to keep production running at shortest possible response times, customized the software interface to best fit our in-house Operations system, and even wrote a step-by-step machine processing manual. As a result of the project, we have exposed more than 16,000 times on various product types and solder mask brands/colors. Limata, in a very short timeframe as a company, has definitely shown they are truly innovative and will be challenging the industry of direct imaging for the top spot.
Kevin Beattie
Process Engineer
TTM Technologies
Forest Grove Division