Choosing an Electrical Plug Lockout starts with the plug, not the product label. A molded three-prong plug may need a different enclosure from a compact two-prong plug. Add a bulky cord grip or a nearby wall, and fit becomes less obvious. The device must fully contain the plug and prevent reconnection while maintenance is underway.
The stakes are measurable. OSHA estimates that compliance with its lockout/tagout standard prevents about 120 fatalities and 50,000 injuries each year. These figures cover hazardous-energy control broadly, not plug lockouts alone. OSHA’s 29 CFR 1910.147 also emphasizes controlling energy sources before servicing equipment. A lockout device is only one part of that process.
Check plug dimensions, cord diameter, available clearance, and the number of workers who need personal locks. Then confirm the device accepts the required lock and remains secure under ordinary handling. A poor fit can create false confidence. It happens.
One important limitation: I could not verify a reliable, attributable quotation from a named Electrical Plug Lockout specialist, so I will not invent one. Instead, OSHA’s documented guidance provides a sound starting point: isolate the energy source, apply the appropriate lockout, and verify that equipment cannot restart. Use this outline to compare designs against the plug and work conditions you actually face.
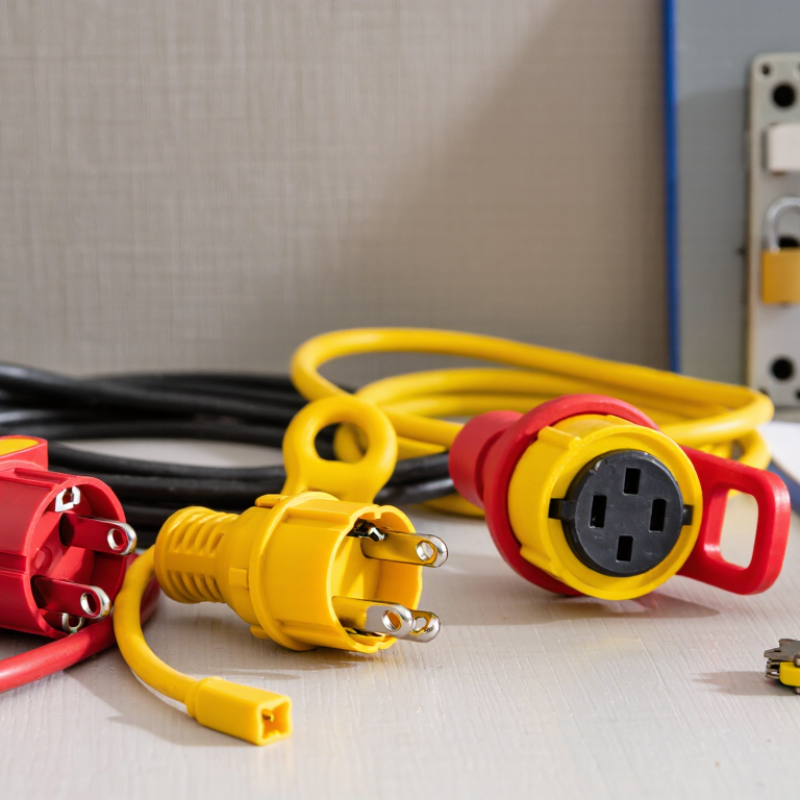
An electrical plug lockout is a durable enclosure that covers an equipment plug. It prevents the plug from entering a socket during maintenance or repair. A lock and warning tag show that the equipment must remain disconnected. This control is useful when unplugging alone does not prevent another person from reconnecting the machine. Think of a workshop drill, portable heater, or cleaning machine left beside a service area.
Use a plug lockout before work begins on equipment with an accessible plug and unexpected start-up risks. It is especially important in shared workspaces, where someone may restore power without knowing about the repair. Check the plug shape, cable exit, enclosure size, and lock compatibility. The device should close firmly without crushing the cable. It should also remain visible near the power point. A trained worker should verify isolation and test the equipment before touching internal parts. Small oversights can matter.
How to Choose the Right Electrical Plug Lockout?
How to Identify the Plug Type and Electrical Hazard
Start with the plug, not the lockout device. Check its shape, voltage marking, number of pins, grounding contact, and cable entry point. A two-pin plug differs from a grounded industrial plug. Some plugs also have side tabs, recessed contacts, or oversized bodies. Measure the plug before selecting a device. A loose fit is a failure waiting to happen.
Next, identify the energy source and the equipment it powers. Confirm whether the plug is connected to a wall outlet, extension lead, generator, or temporary distribution panel. Look for damaged insulation, heat marks, moisture, exposed conductors, and unexpected backfeed sources. OSHA estimates that effective lockout/tagout practices prevent about 120 workplace deaths and 50,000 injuries each year. That figure shows why identification must be practical, not cosmetic. A plug can look harmless. That assumption fails.
Select a lockout that fully encloses the plug and prevents reconnection. Verify its opening size, cable clearance, material strength, and compatibility with the plug’s geometry. Then isolate the circuit, apply the device, and test for zero energy using suitable instruments. NFPA 70E emphasizes risk assessment, verification, and electrically safe work conditions. Do not rely only on a warning label. I have seen teams check the switch, but not the hidden second supply. That missed step deserves honest review. Photographing the plug and recording its type can improve future inspections.
Choosing a plug lockout starts with the plug, not the lock. Inspect its shape, width, pin layout, and molded body. A straight plug may fit differently from an angled plug. Some plugs also have oversized housings or attached adapters. Measure the plug at its widest point. Check the cord diameter, too. A device that closes around the plug may not hold a thick industrial cord securely.
The enclosure should fully surround the plug and prevent access to the connection points. Its entry opening must be large enough for the plug, but not so loose that the plug can slide out. Confirm that the cord exit does not pinch, bend sharply, or damage the insulation. It should also allow the device to close without force. Small details matter.
Test the fit before an emergency.
In workplace inspections, I have seen lockouts selected by appearance alone. That approach often fails with molded plugs and short cords. Try the device on the actual plug, using the site’s normal padlock and tag. Check whether the locked unit stays stable during a gentle pull. Do not rely on a universal label without checking dimensions. Manufacturer instructions and a qualified safety review should guide the final choice. I would also document the plug type, cord size, and any fit problem. That record may reveal a weak assumption later.
How to Choose the Right Electrical Plug Lockout?
A reliable plug lockout should fully enclose the plug and block access to the outlet. Check the size range carefully. A loose device may slide off during maintenance. A tight device may damage the plug or cable. Choose nonconductive materials with strong impact resistance. Look for smooth edges, secure hinges, and a shackle opening that accepts approved safety locks. Clear warning labels also help workers recognize isolation status quickly.
Durability matters in real workplaces. Inspect the lockout for resistance to oils, dust, moisture, and temperature changes. A strong shell is useful, but it does not solve every problem. The cable exit must remain protected without sharp bending. Confirm that the device stays closed under light pulling force.
During inspections, workers should verify the plug cannot be reinserted. They should also follow site procedures and test the equipment before work begins. A lockout is only one part of energy control.
Tips: Measure the plug before ordering. Test the lockout with gloves on. Check visibility from several steps away. Replace cracked or distorted parts immediately. Do not assume one model fits every plug. I once overlooked cable clearance, and the lockout became awkward to secure. That small mistake showed why a practical trial matters more than a product description.
Choosing the right electrical plug lockout starts with the plug itself. Identify its shape, cord exit, body width, and operating environment. A lockout should cover the plug completely and prevent access to the receptacle. It must not press against exposed terminals or strain the cable. Check the equipment instructions when available, then compare the plug with the lockout’s size range. A loose fit is unsafe. An overly tight fit may damage the plug.
Tips: De-energize the circuit before applying the device. Verify zero energy with a properly rated tester. Try the equipment’s normal start control afterward. The machine should remain inactive. Insert the plug fully into the lockout, close the enclosure, and attach a durable personal lock and warning tag. Pull the enclosure gently. It should stay closed without excessive movement. Never force a mismatched device into place.
Inspect the lockout for cracks, distorted hinges, worn openings, or missing identification. Confirm that the plug cannot be removed while locked. In field work, a visual check alone is not enough; a careful tug test often reveals poor fit. I have seen workers focus on the lock hole and overlook the cable angle. That mistake can leave pressure on the plug. If the device shifts, stop and choose a better size. Record the inspection when workplace procedures require it, and remove the lockout only through the authorized release process.
„Thanks to the LUVIR technology, the solder resist process could be switched directly from the previously used mask exposure to direct exposure. As an outstanding digital solution on the market, this technology has been able to demonstrate fast process times and superior quality on our certified conventional ink in production. This allowed us to fully digitize the solder mask process at low cost – without process or ink adjustments. An excellent benefit to our production in Rot am See.“
Ralf Göhringer (Head of Production WE Rot am See)
I would definitely recommend the Limata machine and team for a future company purchase
Michael Greenaway
Compunetics Inc.
“The Limata ldi has been amazing!! Best thing we did was buy this machine”
Richard Brady
GM
Circuitlabs
“Since 2019, we have been running the Limata X1000 LDI system (including LUVIR for solder mask imaging) in daily production as an addition to our current process with film. The machine was capable of properly exposing Taiyo PSR-4000 BN (DI) solder mask types on normal to high-copper boards using a new and unique direct imaging process. The machine operating interface is very user friendly which allowed for a quick technical training curve. The pre-registration processing reduced several seconds of production time at every print. Limata support and service staff is incomparable. They supported our team every step of the way at basically any time of the day or night, with literally, an immediate response time, customizing the software interface to best fit our Operations and needs.
We have exposed more than 8,000 prints since end of October, on various solder mask colors and some resist film panels. Limata, has proven to be very capable and innovative. They are a strong contender in the industry.
We have very much enjoyed this project, and working with the team!
Thank you Limata for the continued support and being a part of our growth.”
Bill Sezate
Vice President, GM
Summit Interconnect
As a replacement to our current contact exposure process with film, the LIMATA X2000 system including LUVIR-Technology was capable of properly exposing non-LDI solder mask types using a direct imaging process. The machine offers cutting edge software with a very intuitive operating interface which allowed for quick technician training curve. The dual drawer system combined with pre-registration processing reduced several seconds of production time at every machine cycle. Limata support and service staff is world class. They added software patches to keep production running at shortest possible response times, customized the software interface to best fit our in-house Operations system, and even wrote a step-by-step machine processing manual. As a result of the project, we have exposed more than 16,000 times on various product types and solder mask brands/colors. Limata, in a very short timeframe as a company, has definitely shown they are truly innovative and will be challenging the industry of direct imaging for the top spot.
Kevin Beattie
Process Engineer
TTM Technologies
Forest Grove Division