Choosing the right Grinding Tool starts with the job, not the catalog. A wheel that works well on hardened steel may clog quickly on soft aluminum. A compact die grinder can reach a narrow recess, while a bench grinder suits heavier, steady work. Small details matter. Material, stock removal, finish, tool access, and operating speed all shape the choice.
Grinding expert Jeffrey A. Badger is associated with the concise reminder, “Grinding is a science, not an art.” That idea helps keep selection practical: match the abrasive and tool to the workpiece, then check the manufacturer’s speed rating and operating instructions. For example, a fine abrasive may leave a smoother surface, but it can remove material slowly. A more aggressive option may save time and leave marks that need another pass. There is no universal best choice.
This guide compares common grinding tools, abrasive types, and their typical uses. It also considers factors people sometimes overlook, such as heat buildup, vibration, wheel condition, and how securely the workpiece is held. A test on scrap material can reveal problems before they affect a finished part. Still, judgment is imperfect; the same setup may behave differently across materials and machines. The goal is not to promise a flawless result. It is to help you choose more confidently, work carefully, and know when to reassess the tool.
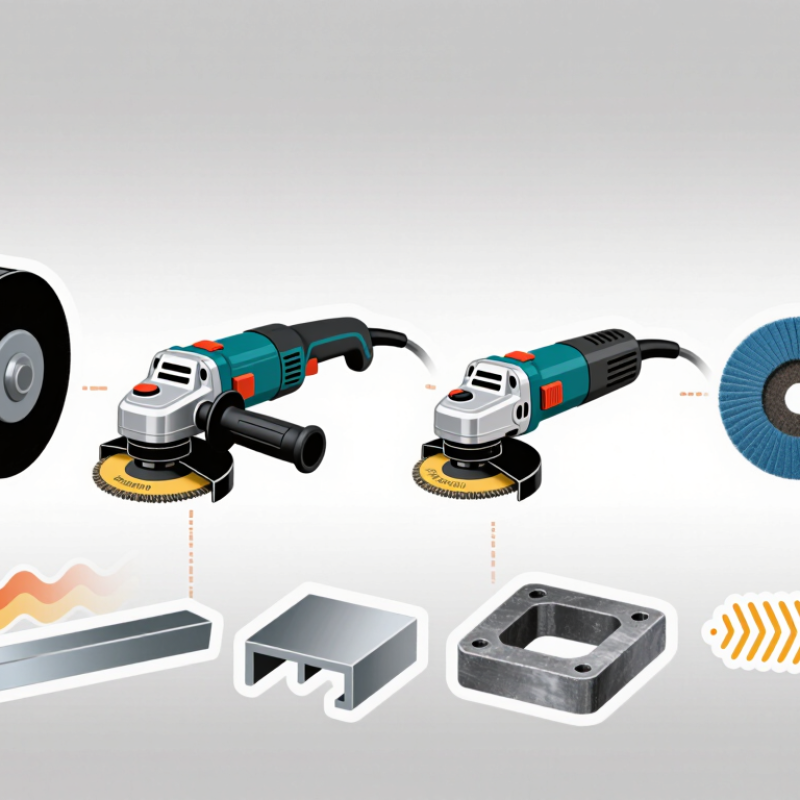
Before choosing a grinding tool, identify the material and the exact task. Steel, stainless steel, aluminum, ceramic, and wood respond differently to heat and abrasion. A hard material may need a tougher abrasive, while softer metals can clog a wheel quickly. That changes everything. Check the workpiece label or technical data when possible; appearance alone can be misleading.
Then define what the tool must do: remove a weld, shape an edge, smooth a surface, or prepare it for coating. Heavy stock removal calls for a different abrasive and grit than a fine finish. For example, a coarse wheel can quickly level a weld bead, but it may leave deep scratches that take extra work to remove. Thin sheet metal also heats fast, so lighter pressure and brief passes can help limit warping. One easy-to-miss detail is the desired finish. It is tempting to focus only on speed, yet a fast cut can create more cleanup. There is no universal choice, and even a sound recommendation may need adjustment. Test the setup on scrap material, watch for discoloration or uneven marks, and follow the tool maker’s limits for wheel type and operating speed.
Choosing a grinding tool starts with the workpiece and the shape you need. An angle grinder handles broad surfaces and cut edges, while a bench grinder is steadier for sharpening or shaping small parts. A die grinder reaches tight corners, but its small contact area can remove material quickly. The details matter. Match the tool’s speed and disc size to its instructions, and hold the work securely.
Abrasive choice changes both cutting speed and finish. Aluminum oxide is a practical option for steel and general-purpose work. Silicon carbide suits harder, brittle materials such as stone, though the correct wheel depends on the task. Zirconia and ceramic abrasives often cut aggressively on metal and can last longer under pressure. Diamond abrasives are used for many hard, non-metallic materials. Not always. A harder abrasive is not automatically the better choice; heat, pressure, and surface finish matter too.
For example, a coarse wheel may remove a rough weld quickly, but leave marks that need another pass. A finer grit can smooth the surface, yet may work slowly on heavy buildup. Test a small area. Check the abrasive label for compatible materials, and inspect wheels for cracks before use. Wear eye and hearing protection, keep guards in place, and pause if the workpiece becomes unusually hot. I’ve found that tool choice takes a little trial and adjustment; one small test often prevents an uneven finish.
The desired finish should guide your choice of grinding tool. For fast stock removal, a coarser abrasive and a firm, stable contact can remove material efficiently, but they may leave deep scratches. For a smoother, satin-like surface, use a finer abrasive and lighter pressure. A fine grit is not automatically better; it may take too long if the surface still has uneven marks.
Look at the abrasive type, grit range, tool speed, and the material being worked. Steel and wood respond differently, so check the tool’s specifications and use an abrasive suited to the workpiece. Keep the tool moving to avoid heat buildup or gouges, and inspect the scratch pattern under good light. Test on scrap first. A short pass can reveal whether the finish is moving in the right direction. Sometimes it looks worse. That may mean earlier scratches are becoming visible, not that the tool is wrong. Change one variable at a time, such as grit or pressure, so you can tell what improved the result.
Before choosing a grinding tool, match its power to the work. Light sharpening needs less sustained output than removing welds or shaping thick steel. Check the tool’s rated power and duty cycle, not just its advertised maximum. If it slows under pressure, forcing it can overheat the motor and damage the workpiece. More power is not always better.
Compatibility matters just as much. Confirm that the wheel suits the material, fits the arbor, and has a maximum speed rating at least as high as the tool’s speed. A wheel that looks close enough may still be the wrong size. Check the manual and the markings on the wheel; never rely on appearance alone. It is easy to focus on motor power and overlook these small details. They deserve a second check.
Safety requirements should shape the choice, too. Look for a secure guard and handles that let you keep both hands steady. Wear eye protection and hearing protection, and use respiratory protection when the material or dust calls for it. Keep sparks away from flammable materials. Unplug the tool before changing a wheel, then inspect it for chips or cracks. Test it briefly in a clear area before grinding. Small checks take time. They are still worth doing.
How to Choose the Right Grinding Tool for Your Needs
Evaluate Cost, Maintenance, and Service Life
A low purchase price can hide a high cost per finished part. Compare tools by usable parts produced, including wheel changes, dressing time, scrap, and machine downtime. The U.S. Department of Energy’s 2010 Operations & Maintenance Best Practices Guide reports that maintenance can represent 15–40% of the cost of goods produced. That broad facility-level range is not a grinding-tool estimate, but it shows why upkeep belongs in the calculation. Track actual shop-floor results rather than relying only on catalogue life claims.
Service life depends on the material, operating speed, pressure, coolant, and operator technique. Record how many acceptable parts each tool produces before replacement, and note any finish or dimension problems. A wheel that lasts longer may still cost more if it needs frequent dressing or slows production. Estimates can be messy at first; even a simple log of change dates, part counts, and downtime improves the next purchasing decision.
Tips: Test a small batch under normal production conditions. Compare cost per acceptable part, not cost per tool. Check the tool for wear and damage during routine inspections, and follow its operating instructions. Keep one result that surprised you; it may reveal an assumption worth revisiting.
Compare purchase cost, maintenance burden, and service life before choosing a tool.
How to read this: Ratings are qualitative planning estimates on a 1–5 scale, not measured prices or guaranteed lifespans. A higher score means higher purchase cost, greater maintenance burden, or longer expected service life, respectively. Actual results depend on the material, tool quality, operating conditions, and workload; these tool types may suit different applications.
„Thanks to the LUVIR technology, the solder resist process could be switched directly from the previously used mask exposure to direct exposure. As an outstanding digital solution on the market, this technology has been able to demonstrate fast process times and superior quality on our certified conventional ink in production. This allowed us to fully digitize the solder mask process at low cost – without process or ink adjustments. An excellent benefit to our production in Rot am See.“
Ralf Göhringer (Head of Production WE Rot am See)
I would definitely recommend the Limata machine and team for a future company purchase
Michael Greenaway
Compunetics Inc.
“The Limata ldi has been amazing!! Best thing we did was buy this machine”
Richard Brady
GM
Circuitlabs
“Since 2019, we have been running the Limata X1000 LDI system (including LUVIR for solder mask imaging) in daily production as an addition to our current process with film. The machine was capable of properly exposing Taiyo PSR-4000 BN (DI) solder mask types on normal to high-copper boards using a new and unique direct imaging process. The machine operating interface is very user friendly which allowed for a quick technical training curve. The pre-registration processing reduced several seconds of production time at every print. Limata support and service staff is incomparable. They supported our team every step of the way at basically any time of the day or night, with literally, an immediate response time, customizing the software interface to best fit our Operations and needs.
We have exposed more than 8,000 prints since end of October, on various solder mask colors and some resist film panels. Limata, has proven to be very capable and innovative. They are a strong contender in the industry.
We have very much enjoyed this project, and working with the team!
Thank you Limata for the continued support and being a part of our growth.”
Bill Sezate
Vice President, GM
Summit Interconnect
As a replacement to our current contact exposure process with film, the LIMATA X2000 system including LUVIR-Technology was capable of properly exposing non-LDI solder mask types using a direct imaging process. The machine offers cutting edge software with a very intuitive operating interface which allowed for quick technician training curve. The dual drawer system combined with pre-registration processing reduced several seconds of production time at every machine cycle. Limata support and service staff is world class. They added software patches to keep production running at shortest possible response times, customized the software interface to best fit our in-house Operations system, and even wrote a step-by-step machine processing manual. As a result of the project, we have exposed more than 16,000 times on various product types and solder mask brands/colors. Limata, in a very short timeframe as a company, has definitely shown they are truly innovative and will be challenging the industry of direct imaging for the top spot.
Kevin Beattie
Process Engineer
TTM Technologies
Forest Grove Division