Choosing the right Plastic Extruder starts with the material and product, not the machine’s headline output. A line designed for flexible film may not suit rigid pipe or a precise profile. Resin type, additives, moisture sensitivity, and recycled-content variation can all affect processing. Small details matter. A color change, for example, may require more purging time than expected.
Compare the required output with the extruder’s stable operating range. Ask about screw design, diameter, and length-to-diameter ratio, then check whether temperature zones can hold steady during a production run. A neat control panel is useful, but it cannot compensate for a poor match between screw and material. Request trial data using a representative resin, and look closely at melt quality, output consistency, and energy use. Numbers from a brochure are only a starting point.
The extruder is also part of a line. Its die, screen changer, cooling system, haul-off, and controls must work together. Consider available floor space, operator experience, cleaning access, spare parts, and service response. These practical limits are easy to overlook when comparing specifications. I would not assume the largest machine is the safest investment; oversized equipment can run inefficiently at low output. Nor is the lowest purchase price always economical. The right choice depends on verified production needs, realistic growth plans, and support you can actually reach. Some uncertainty remains until a material is tested on the machine. That is worth admitting before placing an order.
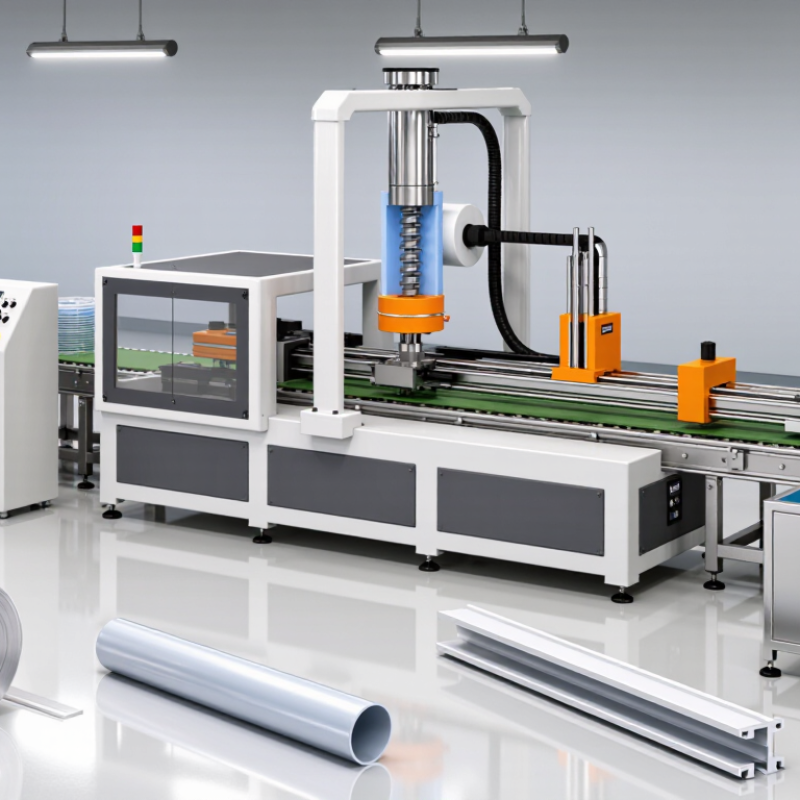
The right extruder starts with a precise description of the material. “Polyethylene” alone is not enough. Identify the resin grade, melt-flow range, additives, fillers, and recycled content. These details affect screw design, barrel temperature, and wear. Check the supplier’s technical data sheet, but verify key values with incoming-material tests when consistency matters. Small differences can change how steadily the melt flows.
Moisture and heat sensitivity deserve attention. Some polymers need drying before processing; others can degrade if they remain too hot for too long. Note the recommended processing window and any special handling requirements. It is tempting to specify only the resin family. That is often too vague. In practice, a damp pellet or a changing recycled blend can cause bubbles, surface marks, or unstable output. A trial run may reveal problems that a data sheet cannot.
Describe the finished product just as carefully. Record its shape, dimensions, wall thickness, tolerance, and expected output per hour. A thin tube, for example, needs different flow control and cooling than a thick sheet. Include the die and downstream equipment in the discussion; an extruder cannot compensate for every design mismatch. Define acceptable variation, too. Exact targets help, but real production has limits. Leave room to review samples and adjust settings before committing to a full production run.
Start with the resin grade and the finished product’s dimensions, tolerances, output, and end-use requirements. Processing temperatures and drying conditions are typical starting points; confirm them with the resin supplier and conduct trials for the selected grade and equipment.
| Plastic material | Common extruded products | Typical melt-processing range | Drying considerations | Extruder and process considerations | Product specifications to define |
|---|---|---|---|---|---|
| HDPE High-density polyethylene | Pipes, sheets, profiles, film, and blow-molding parisons | Approximately 180–230°C, depending on grade and product | Usually not required for properly stored, standard grades; remove surface moisture if present. | A general-purpose single-screw extruder is common. Select screw design, die, and cooling system for the product and output rate; control melt temperature and pressure. | Pipe diameter and wall thickness; profile dimensions; sheet thickness; dimensional tolerance; output rate; pressure or impact requirements. |
| PP Polypropylene | Strapping, sheets, profiles, pipes, and fibers | Approximately 190–240°C, depending on grade and product | Typically no predrying is needed for standard grades if the resin is kept dry and clean; follow grade-specific instructions. | Use a screw and die suited to the grade’s melt flow and product geometry. For fibers or thin products, stable throughput and precise cooling are important. | Width, thickness, tensile properties, shrinkage, surface finish, line speed, and intended service temperature. |
| PVC Rigid or flexible compounds | Pipes, window profiles, cable insulation, tubing, and sheets | Often approximately 160–200°C; the compound and process window are critical. | Usually not required for dry compound; protect material from moisture and contamination. | Choose a PVC-compatible screw, barrel, and temperature-control system. Limit excessive heat and residence time to reduce degradation; confirm materials of construction and venting needs with the equipment supplier. | Rigid or flexible formulation; profile geometry; wall thickness; dimensional tolerance; surface quality; required standards and application conditions. |
| PET Polyethylene terephthalate | Sheet, film, strapping, and monofilament | Often approximately 260–290°C, depending on resin grade and application | Thorough dehumidifying drying is generally essential. Temperature, time, and target moisture depend on the grade; excessive moisture can cause hydrolytic degradation during processing. | Consider a dehumidifying dryer, moisture measurement, controlled feeding, and a melt system designed for the required output and product. Manage residence time and avoid contamination. | Sheet or film thickness, width, optical clarity, moisture-sensitive quality requirements, tensile properties, and production rate. |
| ABS Acrylonitrile butadiene styrene | Profiles, sheets, pipes, and appliance or automotive trim | Approximately 200–250°C, depending on grade and product | Often requires predrying because absorbed moisture can cause surface defects; use the resin supplier’s specified drying conditions. | Match screw design and output to the grade’s melt flow and product dimensions. Stable melt temperature and effective calibration or cooling help maintain dimensional accuracy. | Impact strength, surface finish, color, profile or sheet dimensions, tolerance, and any required flame or weathering performance. |
| LDPE / LLDPE Low-density polyethylene grades | Blown film, cast film, tubing, and coatings | Approximately 160–230°C, depending on grade and process | Typically not required for standard grades if stored correctly; prevent moisture and foreign-material contamination. | For film, consider a film screw, die design, cooling capacity, and haul-off system. Match die width and line speed to target film width, gauge, and output. | Film width and thickness, lay-flat width, bubble stability, optical properties, sealability, and line output. |
Start with the product and material, not the machine’s headline output. A single-screw extruder often suits steady melting and conveying for pipe, profiles, and sheet. It can be simpler to operate, but some formulations need more mixing than it provides. Not always.
A twin-screw extruder can offer stronger blending, controlled feeding, and better handling of varied ingredients. It is often considered for compounding or processes that need consistent dispersion. The trade-off may include greater equipment complexity and a more demanding setup. For high-viscosity materials or specialized forming tasks, a ram-style system may be worth assessing. Its intermittent operating cycle will not suit every production target.
Match the screw design and operating range to the resin’s heat sensitivity, flow behavior, and any fillers. Then check the whole line: die, cooling method, haul-off, and cutter all affect the finished product. It is tempting to rank machines by peak output; that can be a poor shortcut. There is no universal winner. During a material trial, record melt pressure, torque, output stability, and dimensions across the run. A sample that looks good for five minutes may still vary after the line warms up. Compare those results with cleaning time and changeover needs, too.
Choosing a plastic extruder starts with the material, not the machine’s maximum rated output. Polyethylene, PVC, and filled compounds respond differently to heat and shear. A general-purpose screw may handle one resin well but produce uneven melt with another. Check the screw’s diameter, length-to-diameter ratio, compression ratio, and mixing section against the resin supplier’s processing range. That matters.
Screw design should also reflect the finished product. A pipe line may need steady melt delivery and consistent wall thickness, while a profile with changing cross-sections can be more sensitive to pressure fluctuations. Heat-sensitive materials often require controlled shear and temperature, rather than simply higher screw speed. For abrasive, filled compounds, screw and barrel wear deserve attention. Small details count.
Match output capacity to the whole production line, not only the extruder. Compare required kilograms per hour with the die, cooling system, haul-off, and cutting equipment. A machine that can theoretically deliver 500 kilograms per hour may run much slower when the die creates high pressure or cooling becomes the bottleneck. Not just peak rate. Leave reasonable capacity for product changes and normal interruptions, but avoid paying for unused throughput. A spreadsheet helps narrow options; it rarely captures every material variation. Trial runs with the actual resin can expose issues that specifications miss.
Match screw design and output capacity to your production needs. The chart shows indicative throughput planning ranges for single-screw extruders by screw diameter. Actual output varies with resin, screw geometry, screw speed, and operating conditions.
Use the ranges as a starting point, not a guaranteed machine rating. Confirm expected output with the resin supplier and extruder manufacturer, and choose a screw design suited to the material’s feeding, melting, mixing, and heat-sensitivity requirements.
Assess Controls, Energy Efficiency, and Maintenance Requirements
A suitable extruder should make process changes visible and repeatable. Check whether operators can monitor melt temperature, screw speed, pressure, and output from one clear control panel. Alarm history and recipe storage help teams spot drift between shifts. Ask to see these functions during a material run, not only in a demonstration. A polished screen is not proof of stable production.
Energy figures need context. Compare kilowatt-hours per kilogram at similar output, resin, and product thickness; otherwise, the numbers can mislead. Look closely. Variable-speed drives and insulated barrels may reduce wasted power, but actual savings depend on operating conditions. Review production logs where possible. I would not choose based on the lowest quoted energy figure alone; it is easy to misread.
Tips: Ask how long routine screw and screen changes take. Check access to heaters, filters, and lubrication points, and request a maintenance schedule listing expected wear parts. Confirm technicians can retrieve fault codes and that spare parts are clearly specified. Small access problems become daily frustrations. Leave room for them in your evaluation.
How to Choose the Right Plastic Extruder?
Compare Safety Features, Supplier Support, and Total Ownership Cost
A plastic extruder should fit both your production needs and your operators’ daily routines. Check that guards cover moving parts and that emergency stops are easy to reach from the control side. Ask how the machine handles temperature alarms, pressure changes, and safe shutdowns. Clear procedures matter. During a factory visit, watch an operator access the screen and clean around the feed throat. Small design details can affect real work.
Tips: Request a safety-feature list and a routine-maintenance schedule. Ask who trains operators, how quickly parts can be supplied, and what support is available after installation. Write down the answers.
Purchase price is only one part of ownership cost. Include energy use, tooling, expected wear parts, maintenance hours, and downtime in your comparison. Ask suppliers to explain their estimates and assumptions; production conditions can change the numbers. Check whether manuals are clear and whether troubleshooting support is practical for your team. I would not assume the lowest operating-cost estimate will hold true without testing it against your material, output target, and shift pattern.
„Thanks to the LUVIR technology, the solder resist process could be switched directly from the previously used mask exposure to direct exposure. As an outstanding digital solution on the market, this technology has been able to demonstrate fast process times and superior quality on our certified conventional ink in production. This allowed us to fully digitize the solder mask process at low cost – without process or ink adjustments. An excellent benefit to our production in Rot am See.“
Ralf Göhringer (Head of Production WE Rot am See)
I would definitely recommend the Limata machine and team for a future company purchase
Michael Greenaway
Compunetics Inc.
“The Limata ldi has been amazing!! Best thing we did was buy this machine”
Richard Brady
GM
Circuitlabs
“Since 2019, we have been running the Limata X1000 LDI system (including LUVIR for solder mask imaging) in daily production as an addition to our current process with film. The machine was capable of properly exposing Taiyo PSR-4000 BN (DI) solder mask types on normal to high-copper boards using a new and unique direct imaging process. The machine operating interface is very user friendly which allowed for a quick technical training curve. The pre-registration processing reduced several seconds of production time at every print. Limata support and service staff is incomparable. They supported our team every step of the way at basically any time of the day or night, with literally, an immediate response time, customizing the software interface to best fit our Operations and needs.
We have exposed more than 8,000 prints since end of October, on various solder mask colors and some resist film panels. Limata, has proven to be very capable and innovative. They are a strong contender in the industry.
We have very much enjoyed this project, and working with the team!
Thank you Limata for the continued support and being a part of our growth.”
Bill Sezate
Vice President, GM
Summit Interconnect
As a replacement to our current contact exposure process with film, the LIMATA X2000 system including LUVIR-Technology was capable of properly exposing non-LDI solder mask types using a direct imaging process. The machine offers cutting edge software with a very intuitive operating interface which allowed for quick technician training curve. The dual drawer system combined with pre-registration processing reduced several seconds of production time at every machine cycle. Limata support and service staff is world class. They added software patches to keep production running at shortest possible response times, customized the software interface to best fit our in-house Operations system, and even wrote a step-by-step machine processing manual. As a result of the project, we have exposed more than 16,000 times on various product types and solder mask brands/colors. Limata, in a very short timeframe as a company, has definitely shown they are truly innovative and will be challenging the industry of direct imaging for the top spot.
Kevin Beattie
Process Engineer
TTM Technologies
Forest Grove Division