In 2026, choosing an External Meter Box means balancing protection, access, and compatibility—not just appearance. The right enclosure should suit the meter type, installation location, and equipment it needs to house. A box exposed to driving rain, strong sun, or coastal air may need different materials and weather protection from one mounted in a sheltered entryway. Small details matter.
Start by checking the meter’s dimensions, cable-entry points, and the space needed for safe reading and maintenance. Compare the box’s construction, door security, seals, and stated environmental ratings with the conditions at your property. Then confirm that its layout works with the requirements of your utility provider and local installation guidance. These details can vary by location, so a product description alone may not settle the question.
A sturdy-looking enclosure is not automatically the best fit. A door that catches, crowded wiring space, or an awkward mounting position can become a daily frustration—or complicate future service. Think about who will need access and whether the box can be inspected without moving stored items or garden equipment. If measurements or installation requirements are unclear, ask a qualified electrician or your utility provider before buying. It is tempting to choose quickly. A little checking now can prevent a poor fit later, though no checklist replaces site-specific advice.
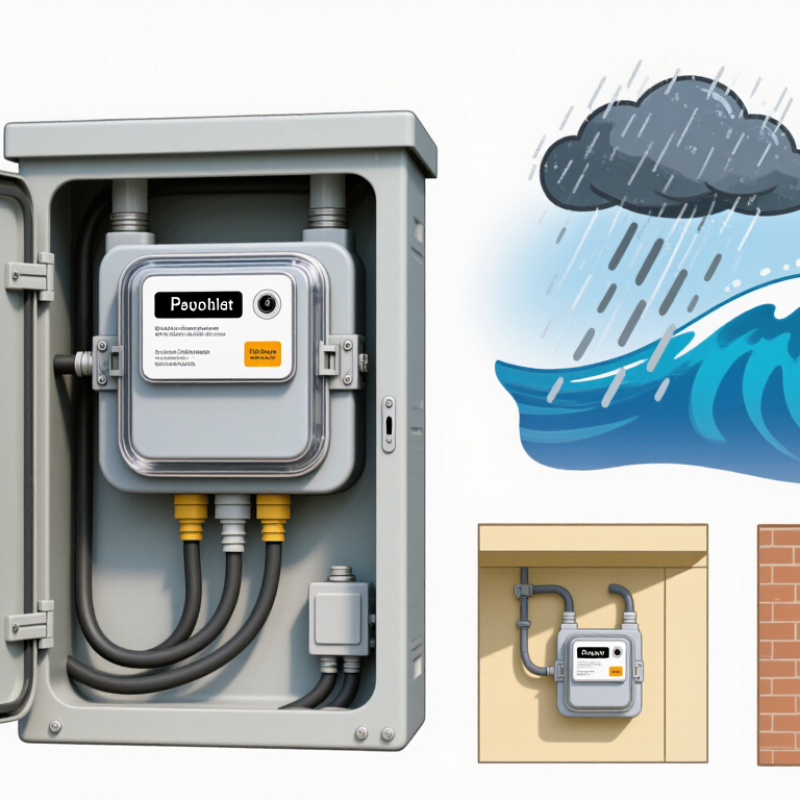
An external meter box is an outdoor enclosure that holds and shields a utility meter where a service provider can read it. Depending on the installation, it may be mounted on a wall or set into a boundary. The enclosure helps limit exposure to rain, dust, sunlight, and accidental knocks. It also discourages casual contact with meter connections. It is a protective housing, not a guarantee against every hazard.
Look for a box made for outdoor use, with durable, corrosion-resistant materials and a door that closes securely. The meter must remain visible and accessible for authorized readings and maintenance. Check that the enclosure suits the meter’s dimensions and mounting arrangement; a tight fit can obstruct access.
Small details matter. A stiff latch can be frustrating.
Protection depends on correct installation, too. The box should sit firmly, and its seals and openings should match the intended use. Do not cover ventilation features or force a door shut around cables. That sounds obvious, but it is easy to overlook. If the existing box is cracked, loose, or taking on water, ask the utility provider or a qualified professional what replacement is appropriate. Requirements can vary by meter and location, so confirm compatibility before choosing.
Assess the wall before choosing a meter box. Check whether it faces driving rain, strong afternoon sun, or water thrown up from a path. Look for a firm, level mounting surface and enough room to open the cover fully. A box can fit on paper and still be awkward beside a gate or drain. Measure twice.
Note where supply cables will enter and whether the route avoids sharp bends. Photograph the wall, nearby pipes, and the approach to the box. These small details help an electrician judge installation access and suitable enclosure dimensions. Keep the meter readable and reachable without moving stored items. Access matters.
Confirm the metering arrangement before buying: meter count, equipment size, cable entry position, and any required sealing space can affect the internal layout. Ask the installer or relevant metering provider for current specifications, including clearances and environmental protection. Requirements can differ by site, so guessing from another property is risky. A little spare capacity may help if equipment changes later, but an oversized box can be harder to place neatly. I have seen tidy plans miss one inconvenient pipe; even a careful site check can overlook something. Recheck the measurements against the actual equipment.
Start with exposure, not appearance. Galvanized steel offers sturdy impact protection, while stainless steel suits harsher, corrosive locations. UV-stabilized polycarbonate avoids rust and can reduce weight, but check its impact rating and sunlight suitability. No material is best everywhere. Salt spray, direct sun, and accidental knocks can change the choice quickly.
Size the box around the meter, terminals, conduit entries, and cable bend radius. Leave enough room for a technician’s hands and future wiring, not just the meter body. The U.S. Energy Information Administration’s 2022 Form EIA-861 data counted about 119 million advanced meters, roughly 72% of U.S. electric meters. That makes clear access for reading, testing, and communications modules a practical consideration. EIA figures do not replace local utility specifications.
Compare the access details closely: a hinged door, readable meter window, secure latch, and removable deadfront can make inspection less awkward. Check that the door opens fully without hitting a wall or pipe. Match the enclosure’s environmental rating to the site; NEMA 250 classifies protection against conditions such as rain and corrosion. One detail is easy to miss: a larger box may still have poor hand clearance. Measure the actual installation space, then verify approved dimensions and ratings with the serving utility.
In 2026, check the meter box against your local utility’s service manual before buying. In the United States, verify that the socket complies with UL 414 and that the enclosure suits outdoor exposure, such as a NEMA Type 3R rain-resistant rating. Confirm socket configuration, bypass requirements, conductor entry points, and mounting height with the utility. These details vary by service area. A box that fits the wall may still fail inspection.
Also check the locally adopted electrical code and utility clearances. The National Electrical Code sets requirements for safe access and working space; your utility may add rules for meter location, sealing, and disconnect equipment. NFPA’s Home Electrical Fires report estimates that electrical distribution or lighting equipment was involved in an average of 32,620 U.S. home structure fires annually from 2015 to 2019. That figure does not mean meter boxes caused those fires, but it underscores why correct installation and suitable equipment matter.
Tips: Photograph the existing meter socket, labels, and cable entry before requesting approval. Ask the utility to confirm the exact socket type in writing. Check for corrosion, cracked insulation, and water staining around the enclosure. Do not assume a familiar-looking box is acceptable; local requirements can change, and I would verify twice before ordering.
How to Choose the Right External Meter Box in 2026
Choosing a meter box starts with the meter and the site, not the catalogue photo. Check the utility’s approved enclosure requirements and confirm the meter’s dimensions, mounting points, and cable-entry positions. A box that looks spacious may still leave too little room for safe access. Do not guess.
For an outdoor installation, consider rain, wind-blown dust, direct sun, and salty or damp air. Choose an enclosure rated for the actual exposure, with suitable corrosion resistance and a secure, weather-resistant door. Check that the door can open fully without hitting a fence, drainpipe, or parked vehicle. Small details matter. A shaded wall may reduce heat, but it should not block access for readings or maintenance.
Before installation, inspect the wall for cracks, loose render, and a level mounting surface. Confirm the planned position and clearances with the utility and a qualified electrician; local requirements can differ. Keep cable routes and conduit entries in mind, but leave electrical connections to the professional. Take a quick photo of the proposed location and measure it twice. I have seen tidy plans overlook a downpipe. That is an easy mistake to miss, and sometimes the original position simply needs reconsidering.
Compare common IP ratings when selecting an outdoor enclosure. The first digit indicates protection against solid objects and dust; the second indicates protection against water. Higher code digits indicate higher defined protection levels, not a linear measurement.
Before installation: Check the site’s exposure, the meter and enclosure requirements, and local utility rules. Confirm the complete IP rating against IEC 60529 and the product documentation; an IP rating alone does not establish suitability for every installation.
„Thanks to the LUVIR technology, the solder resist process could be switched directly from the previously used mask exposure to direct exposure. As an outstanding digital solution on the market, this technology has been able to demonstrate fast process times and superior quality on our certified conventional ink in production. This allowed us to fully digitize the solder mask process at low cost – without process or ink adjustments. An excellent benefit to our production in Rot am See.“
Ralf Göhringer (Head of Production WE Rot am See)
I would definitely recommend the Limata machine and team for a future company purchase
Michael Greenaway
Compunetics Inc.
“The Limata ldi has been amazing!! Best thing we did was buy this machine”
Richard Brady
GM
Circuitlabs
“Since 2019, we have been running the Limata X1000 LDI system (including LUVIR for solder mask imaging) in daily production as an addition to our current process with film. The machine was capable of properly exposing Taiyo PSR-4000 BN (DI) solder mask types on normal to high-copper boards using a new and unique direct imaging process. The machine operating interface is very user friendly which allowed for a quick technical training curve. The pre-registration processing reduced several seconds of production time at every print. Limata support and service staff is incomparable. They supported our team every step of the way at basically any time of the day or night, with literally, an immediate response time, customizing the software interface to best fit our Operations and needs.
We have exposed more than 8,000 prints since end of October, on various solder mask colors and some resist film panels. Limata, has proven to be very capable and innovative. They are a strong contender in the industry.
We have very much enjoyed this project, and working with the team!
Thank you Limata for the continued support and being a part of our growth.”
Bill Sezate
Vice President, GM
Summit Interconnect
As a replacement to our current contact exposure process with film, the LIMATA X2000 system including LUVIR-Technology was capable of properly exposing non-LDI solder mask types using a direct imaging process. The machine offers cutting edge software with a very intuitive operating interface which allowed for quick technician training curve. The dual drawer system combined with pre-registration processing reduced several seconds of production time at every machine cycle. Limata support and service staff is world class. They added software patches to keep production running at shortest possible response times, customized the software interface to best fit our in-house Operations system, and even wrote a step-by-step machine processing manual. As a result of the project, we have exposed more than 16,000 times on various product types and solder mask brands/colors. Limata, in a very short timeframe as a company, has definitely shown they are truly innovative and will be challenging the industry of direct imaging for the top spot.
Kevin Beattie
Process Engineer
TTM Technologies
Forest Grove Division