A crowded garage rarely becomes useful through guesswork. The right Garage Storage Racks can turn scattered tools, paint cans, and seasonal boxes into a workable system. However, appearance alone proves little. A rack may look strong, yet wobble under uneven loads or block the garage door track.
Industry research supports this growing need for better organization. Grand View Research identifies space efficiency and residential renovation as major drivers in the garage storage market. The Freedonia Group’s shelving analysis also connects demand with home improvement, repair, and remodeling activity. These reports suggest a practical shift: homeowners want storage that saves floor space and remains easy to access.
Barbara Hemphill, a professional organizing authority, famously says, “Clutter is nothing more than postponed decisions.” That idea fits garages closely. Choosing a rack means deciding what stays, what moves, and what needs safer support. Our guide, “10 Tips for Choosing Garage Storage Racks,” examines weight capacity, steel thickness, shelf depth, adjustability, anchoring, corrosion resistance, and installation space. It also considers real details, such as a wet bicycle, a low ceiling, or a toolbox that must slide underneath.
No checklist can predict every garage. One measurement is never enough. Even experienced buyers can overlook wall strength or future storage needs. Therefore, the best choice balances published specifications with hands-on inspection. A rack should fit the space, support the intended load, and remain practical after the garage becomes busy again.
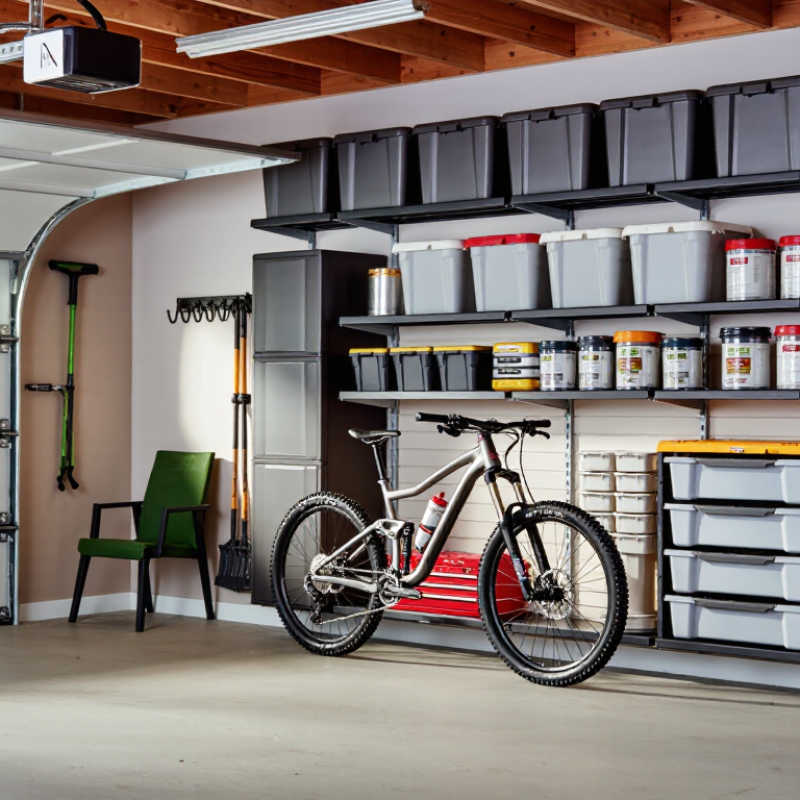
Choosing garage storage racks starts with an honest inventory. Record each box, tool, tire, and seasonal item. Weigh the heaviest unit, not the average one. The U.S. Bureau of Labor Statistics reported 1,069 fatal work injuries in transportation and material-moving occupations during 2023. A garage is smaller, but gravity remains unforgiving. Shelves should never become an improvised work platform.
Read the rack’s load rating carefully. It may describe each shelf, each bay, or the entire assembled unit. Confirm the rating for your exact beam spacing and shelf levels.
The RMI Specification for the Design, Testing, and Utilization of Industrial Steel Storage Racks emphasizes that capacity depends on configuration, connections, and supporting conditions. Concrete floors, anchors, upright frames, and uneven loading all matter. A rack rated for 2,000 pounds may not safely hold 2,000 pounds at one corner.
Apply an 80% working-capacity rule for routine storage. A 500-pound shelf should carry about 400 pounds, leaving room for shifting boxes, imperfect weighing, and future additions. This is a practical buffer, not a universal legal requirement. OSHA 29 CFR 1910.176(b) requires stored materials to remain stable and secure, but it does not replace the rack manufacturer’s instructions or an engineer’s review. Keep dense items low. Place a loaded toolbox near the uprights. Recheck the rack after moving a vehicle part or adding a new bin. I still find “temporary” overloads becoming permanent. That habit deserves scrutiny.
A garage storage rack should fit the room, not merely the available wall. Measure length, width, ceiling height, door travel, and the distance around vehicles. Record pipes, lights, electrical panels, and sprinkler heads. A narrow aisle may look efficient, but it can block access and create unsafe handling conditions.
NFPA 13 requires storage to remain at least 18 inches below sprinkler deflectors in many ordinary storage arrangements. Measure from the sprinkler head, not from the ceiling. This distinction matters when beams, ducts, or sloped ceilings reduce usable height. NFPA’s U.S. Experience with Sprinklers report found sprinklers operated in about 92% of structure fires large enough to activate them and were effective in 97% of those cases. Clearance protects that performance.
Choose rack height only after subtracting the required clearance, lighting space, and practical loading room. Keep bulky boxes below the rack’s upper level. Do not place loose items above the frame. Small errors accumulate. I once treated a ceiling measurement as uniform, and the corner was lower than expected. Recheck every corner. Local fire officials or a qualified sprinkler professional should confirm the applicable NFPA 13 edition and storage arrangement, because requirements can change with commodity type, rack design, and sprinkler classification.
Choosing garage storage racks requires more than checking a weight label. Steel gauge is a useful starting point, but lower gauge numbers usually indicate thicker steel. Compare actual thickness, column shape, weld quality, and coating protection. Gauge labels can vary between manufacturers, so request measured specifications. A rack with thick-looking steel may still use weak connectors.
Beam deflection deserves close attention. I learned this after storing heavy boxes on a long shelf; the beam bent slightly, even though the total load seemed acceptable. Divide the load evenly, inspect the span, and check the manufacturer’s permitted deflection. Shorter beams usually flex less. Keep heavier items near the uprights and lower levels. Measure twice. Then load gradually.
For serious installations, review ANSI/RMI MH16.1 requirements or the latest applicable rack standard. These guidelines address design, testing, load capacity, stability, and safe use. Confirm that the rack suits your floor, ceiling height, seismic conditions, and intended storage. Check anchors, safety pins, bracing, clear aisles, and readable capacity labels. Ten practical checks may include steel thickness, beam deflection, connectors, welds, anchors, bracing, floor condition, corrosion, clearances, and inspection access. I would not rely on appearance alone. Standards improve decisions, but correct installation still matters.
Choosing garage storage racks starts with the bins you already own. Measure each bin from its front edge to its back wall, including handles and lids. A 12-inch bin usually needs a shelf about 14 inches deep. An 18-inch bin needs roughly 20 inches. That extra space prevents lids from catching and leaves room for careful hand placement.
Safe reach matters as much as capacity. Keep frequently used bins between waist and shoulder height, where you can lift without twisting. Place heavy tools on lower shelves, not above your head. For an 18-inch-deep shelf, keep the front edge open and avoid stacking bins behind one another. A small front lip can stop sliding, but it should not block your fingers. Leave a few inches between the rack and a garage wall when doors or lids need clearance.
I once planned shelves around wall width and ignored bin depth. The result looked efficient, but the rear corners became hard to reach. That mistake changed my approach. I now sketch the rack, bin footprint, and walking path before buying materials. Check the rack’s rated load, then reduce the working limit when weight is unevenly distributed. Leave modest clearance between shelves; lids often need more room than expected. Measure twice. Storage rarely stays perfect. New bins arrive, and the original layout may need revision.
| Tip | Planning Dimension | Recommended Guideline | Why It Matters | Quick Check Before Buying |
|---|---|---|---|---|
| 1 | Measure the storage bin depth | Measure from the front lip to the rear wall, including lids and handles. Use the largest bin in the group as the reference size. | Nominal bin sizes can differ from actual outside dimensions, so rack depth should be based on the real bin footprint. | Record the maximum bin depth in inches before selecting the rack. |
| 2 | Shelf depth for 12-inch bins | Choose a 14–16-inch shelf depth. This usually provides about 2–4 inches of front-to-back allowance. | The extra space helps keep bins stable while leaving enough room for fingers to grip the front edge. | Confirm that the usable shelf surface—not only the outside frame depth—is at least 14 inches. |
| 3 | Shelf depth for 15-inch bins | Choose a 17–19-inch shelf depth. A 18-inch shelf is a practical target when the bin depth is close to 15 inches. | A small clearance allowance prevents lids and rear corners from rubbing against posts or walls. | Check the rack’s clear internal depth between uprights and any rear bracing. |
| 4 | Shelf depth for 18-inch bins | Choose a 20–22-inch shelf depth. Avoid forcing an 18-inch bin onto a shelf with no front or rear clearance. | Additional depth improves access and reduces the chance of a bin overhanging the front edge. | Allow approximately 2–4 inches beyond the bin depth, while keeping the load fully supported. |
| 5 | Safe manual reach | Place frequently used bins within approximately 16–20 inches of comfortable reach from the aisle. Treat 20–24 inches as a less convenient maximum for regular access. | Deeper shelves and high bins encourage leaning, twisting, or climbing, which increases handling risk. | Stand in the intended aisle and test whether the rear of the bin can be reached without leaning on the rack. |
| 6 | Aisle clearance | Provide about 30–36 inches of clear walking space in front of the rack. Increase clearance when moving large items or equipment. | A clear aisle improves access, visibility, and the ability to carry bins safely with both hands. | Measure from the rack’s frontmost point to vehicles, doors, workbenches, and other obstacles. |
| 7 | Vertical shelf spacing | Set each shelf at least 2–4 inches higher than the loaded bin. Use larger gaps when lids or handles require extra hand clearance. | Small vertical clearances make bins difficult to lift out and may cause users to pull at an angle. | Measure the bin height with the lid installed, then add the intended lifting clearance. |
| 8 | Load capacity | Estimate the total weight per shelf and select a rated capacity that exceeds the expected load. Keep heavier items on lower shelves. | Load ratings commonly assume evenly distributed weight; concentrated loads can reduce practical capacity. | Do not exceed the manufacturer’s stated shelf rating, and distribute weight across the shelf surface. |
| 9 | Rack stability and anchoring | Anchor tall or narrow racks to a suitable wall structure when permitted by the rack instructions. Keep the rack level. | Anchoring helps reduce tipping caused by uneven loading, accidental impact, or pulling a high bin forward. | Inspect the wall type, anchor points, floor condition, and rack assembly instructions before installation. |
| 10 | Organization and visibility | Use clear labels, group similar items, and keep the most frequently used bins between waist and shoulder height. | Good organization reduces searching, repeated lifting, and the need to use stools or ladders. | Reserve upper shelves for lightweight, infrequently used items and keep heavy bins below shoulder height. |
Choosing garage storage racks requires more than comparing weight ratings.
Start with anchoring. A loaded rack can shift when boxes are pulled from an upper shelf. Check whether the frame accepts floor or wall anchors. Concrete, masonry, and timber each require different fasteners. Follow the installation torque carefully.
A loose anchor is not a minor detail. Leave enough clearance for drilling, doors, and vehicle movement.
Corrosion protection matters in real garages. Moisture collects near floors, especially after rain or winter driving. Look for continuous coating coverage on shelves, posts, welds, and cut edges. Powder coating can help, but damaged areas still need attention. Zinc protection may perform differently from painted steel.
Inspect chipped surfaces before storing tools. I once underestimated a small scratch near a bottom post; damp storage conditions made it spread faster than expected. That was a useful warning.
Ask for clear ASTM durability test information, not a vague “tested” claim. The supplier should identify the applicable ASTM method, load level, test duration, and failure criteria. Check whether testing covered shelf deflection, joint strength, repeated loading, or corrosion exposure. One test cannot prove every type of durability.
Also compare laboratory results with your garage conditions. Salt, temperature changes, uneven floors, and careless loading can reduce service life. Keep heavy containers low. Inspect anchors, fasteners, and welds every few months. Small checks prevent larger failures.
„Thanks to the LUVIR technology, the solder resist process could be switched directly from the previously used mask exposure to direct exposure. As an outstanding digital solution on the market, this technology has been able to demonstrate fast process times and superior quality on our certified conventional ink in production. This allowed us to fully digitize the solder mask process at low cost – without process or ink adjustments. An excellent benefit to our production in Rot am See.“
Ralf Göhringer (Head of Production WE Rot am See)
I would definitely recommend the Limata machine and team for a future company purchase
Michael Greenaway
Compunetics Inc.
“The Limata ldi has been amazing!! Best thing we did was buy this machine”
Richard Brady
GM
Circuitlabs
“Since 2019, we have been running the Limata X1000 LDI system (including LUVIR for solder mask imaging) in daily production as an addition to our current process with film. The machine was capable of properly exposing Taiyo PSR-4000 BN (DI) solder mask types on normal to high-copper boards using a new and unique direct imaging process. The machine operating interface is very user friendly which allowed for a quick technical training curve. The pre-registration processing reduced several seconds of production time at every print. Limata support and service staff is incomparable. They supported our team every step of the way at basically any time of the day or night, with literally, an immediate response time, customizing the software interface to best fit our Operations and needs.
We have exposed more than 8,000 prints since end of October, on various solder mask colors and some resist film panels. Limata, has proven to be very capable and innovative. They are a strong contender in the industry.
We have very much enjoyed this project, and working with the team!
Thank you Limata for the continued support and being a part of our growth.”
Bill Sezate
Vice President, GM
Summit Interconnect
As a replacement to our current contact exposure process with film, the LIMATA X2000 system including LUVIR-Technology was capable of properly exposing non-LDI solder mask types using a direct imaging process. The machine offers cutting edge software with a very intuitive operating interface which allowed for quick technician training curve. The dual drawer system combined with pre-registration processing reduced several seconds of production time at every machine cycle. Limata support and service staff is world class. They added software patches to keep production running at shortest possible response times, customized the software interface to best fit our in-house Operations system, and even wrote a step-by-step machine processing manual. As a result of the project, we have exposed more than 16,000 times on various product types and solder mask brands/colors. Limata, in a very short timeframe as a company, has definitely shown they are truly innovative and will be challenging the industry of direct imaging for the top spot.
Kevin Beattie
Process Engineer
TTM Technologies
Forest Grove Division