A busy tyre workshop depends on clear inspections and steady, repeatable work. Yet the inside of a tyre can be awkward to examine when its sidewalls press together. A Tyre Spreader holds the tyre open, giving the technician a better view of the inner liner, beads, and areas around a suspected puncture. Small details matter: a nail may leave a narrow entry point, while damage inside the casing can be less obvious. Good visibility helps the technician assess what is actually present instead of relying only on the tyre’s outer surface.
In daily workshop use, the right spreader can make inspection and repair preparation more orderly. It may reduce awkward handling and help keep both hands available for careful work. That matters. A stable tyre, suitable lighting, and a clean work area still count. The spreader is only one part of the process, not a guarantee that a tyre is repairable or safe to return to service. Technicians should follow the equipment maker’s instructions and apply their training when judging damage. This is where experience matters, though even experienced workers can miss something when rushed. A Tyre Spreader is valuable because it supports a closer, more consistent assessment—not because it replaces judgment. Workshops choosing one should consider tyre sizes, build quality, adjustment range, and how easily it fits their service routine. The practical question is simple: does it help technicians see and work more carefully, day after day?
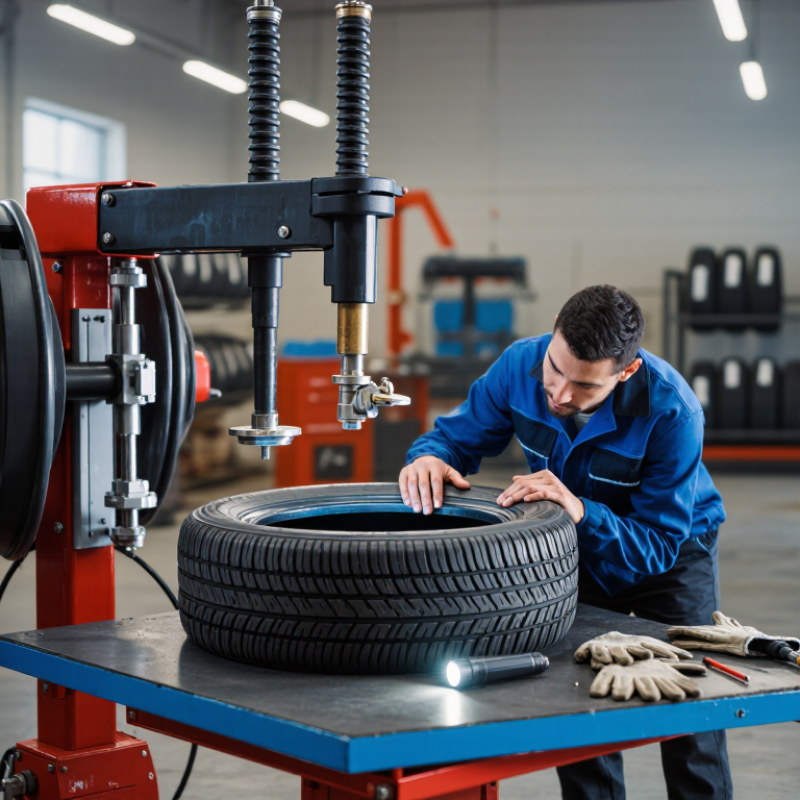
A tyre spreader holds a removed, fully deflated tyre open so a technician can inspect its inner surface. Without one, the casing can fold inward and hide damage near the shoulder or bead. A stable opening also gives better light and room for a careful visual check. That matters.
During inspection, look for embedded objects, cuts, bulges, exposed cords, and signs of heat or uneven wear. A spreader helps reveal the inside of the tread and sidewall, but it does not diagnose every fault. Some damage is subtle. Use proper lighting and follow the tyre maker’s repair criteria and workshop procedures. Never stretch the casing farther than needed; excessive force can distort or damage it.
For repair work, the spreader keeps the area accessible while a technician prepares and checks an approved repair. Clean, unobstructed access helps reduce missed debris and uneven preparation. Small details count. Check that the tyre is seated securely in the tool, and adjust the opening gradually. In a busy workshop, this can make inspections more consistent, though it cannot replace training or a sound judgement call. A second look is often worthwhile.
A tyre spreader holds the beads apart so a technician can see the tyre’s inner liner. With the tyre fully deflated and secured, the opening reveals areas hidden during an exterior check. A work light helps show shallow cuts, embedded objects, cracks, or an unusual patch of wear. More light helps.
Move around the full inner circumference rather than checking only the obvious spot. Look for puncture damage, exposed cords, bulges, separation, and signs of previous repairs. The liner may also show a small mark that looks harmless at first. Check it carefully; appearance alone cannot confirm whether the tyre remains serviceable. Keep hands clear of moving parts and follow the spreader’s operating instructions.
A spreader makes inspection easier, but it does not make judgement automatic. It is easy to rush when a queue builds, and that is when subtle damage can be missed. If a mark is unclear, pause and assess it using the workshop’s inspection procedure. Record relevant findings, and do not rely on the spreader alone to decide whether a tyre is safe to use.
A tyre spreader gives a technician a clear view of the inner liner and puncture path after the tyre is deflated and removed from the wheel. That matters because a nail’s visible entry point may hide internal damage. USTMA’s Tire Repair Basics guidance limits eligible tread punctures to 1/4 inch (6 mm) in diameter. The measurement is a boundary, not a guarantee of repairability. Punctures in the shoulder or sidewall fall outside the repairable area, and the tyre must be inspected inside and out.
Look closely. A spreader helps hold the casing open under controlled conditions, so a technician can check for exposed cords, separation, or damage beyond the puncture. USTMA guidance calls for an approved repair that seals the inner liner and fills the injury channel; an external plug alone is not an adequate repair. NHTSA’s tire safety guidance also stresses checking tyres for damage and following vehicle and tyre-maker recommendations. A tool cannot make an unsafe tyre repairable. And judgment matters. In a busy workshop, the awkward cases deserve a second look, even when the hole appears small.
| Why Do You Need a Tyre Spreader for Your Workshop? — USTMA Repair Limits: Punctures Up to 1/4 Inch (6 mm) in the Tread | |||
|---|---|---|---|
| Inspection or Repair Factor | Guidance | How a Tyre Spreader Helps | Workshop Action |
| Maximum puncture size | USTMA guidance limits repairable punctures to 1/4 inch (6 mm) in diameter, subject to the tire’s repairable-area limits and a complete inspection. | Opens the demounted tire enough to inspect the inner liner and the area surrounding the puncture. | Measure and assess the damage; do not approve a repair based on the outside appearance alone. |
| Puncture location | Repairs are limited to the designated tread repair area. Shoulder and sidewall damage are not repairable under standard industry repair guidance. | Improves visibility of the inside shoulder, tread, and sidewall so damage location can be assessed. | Replace the tire if damage is outside the permitted repair area. |
| Internal damage | A tire can have hidden inner-liner or cord damage even when the external puncture appears small. | Provides access for a close visual and tactile inspection after the tire is removed from the wheel. | Reject the tire if inspection reveals structural damage or other conditions that make it unsafe to repair. |
| Repair method | USTMA guidance calls for a proper internal repair using a combination repair unit, with the puncture channel filled and the inner liner sealed. | Holds the tire open during inspection, preparation, and application of the approved repair materials. | Follow current repair procedures and the repair-material manufacturer’s instructions. |
| Demounted inspection | A complete internal inspection requires the tire to be removed from the wheel; an external plug-only repair is not an adequate substitute. | Helps maintain access to the tire interior while the technician examines the full circumference. | Demount the tire before deciding whether it is repairable. |
| Possible run-flat or underinflation damage | Operating while flat or significantly underinflated can cause internal damage that may not be visible from the outside. | Supports a careful inspection of the inner liner and sidewall flex area. | Assess the complete tire; do not repair if internal damage or the tire maker’s criteria rule it out. |
| Workshop safety and workflow | Repairability depends on damage size, location, internal condition, and applicable tire-specific requirements. | Provides stable access and visibility, helping the technician inspect and work more consistently. | Use the spreader as an inspection aid, not as proof that a tire is repairable. |
| Important note | The 1/4-inch (6 mm) limit is not a guarantee that every tread puncture can be repaired. Always inspect the demounted tire and follow current USTMA guidance, applicable regulations, and the tire manufacturer’s repair instructions. | ||
A tyre spreader gives a technician a clearer view inside a tyre after it has been removed from the wheel and fully deflated. By holding the beads apart, it exposes the inner liner and areas around a puncture that are difficult to inspect from the outside. A small nail hole may look simple, while the inner surface shows a wider tear or damage to the cords.
That matters. With steady lighting, the technician can check for cracks, bulges, exposed cords, contamination, and signs that the tyre was driven while underinflated. The spreader should open the tyre only enough for a careful inspection; forcing the beads apart can obscure details or risk further damage. A probe or fingertip can help locate a puncture, but visual checks remain essential.
Look closely. Damage near the shoulder, multiple injuries, or separated layers may change whether a repair is appropriate. The spreader does not reveal every weakness, and a quick glance can miss subtle internal damage. I have found that documenting the injury’s position and size helps make decisions more consistent, though measurements are not always easy on a curved surface. Technicians should follow recognised repair procedures and assess the whole tyre, not just the visible hole.
In a safe repair workflow, a tyre spreader is used after the tyre has been removed from the wheel and fully deflated. Check the casing for obvious damage before placing it in the tool. Secure it evenly, then open the sidewalls only as far as needed. No shortcuts here. Excessive spreading can strain the casing and obscure the damage rather than help.
With the tyre held open, use good lighting to inspect the inner liner and locate the injury. Look for embedded objects, cuts, bulges, and signs of heat or separation. Rotate the casing slowly; a small puncture can be easy to miss. Light helps. Clean the area and assess whether the damage is repairable under the tyre maker’s repair guidance. A spreader improves access, but it cannot determine structural safety on its own. Even experienced technicians can rush this step, so a second look is worthwhile. After an approved repair, complete the required inspection and pressure checks before returning the tyre to service.
Where a tyre spreader fits in a safe, step-by-step repair workflow
The bars show workflow order only—not repair duration or risk. Use the spreader after the tyre has been removed from the wheel and fully deflated: it holds the casing open so the inner liner can be inspected and any repair can be assessed against the tyre maker’s guidelines. Follow appropriate safety procedures when remounting and inflating.
„Thanks to the LUVIR technology, the solder resist process could be switched directly from the previously used mask exposure to direct exposure. As an outstanding digital solution on the market, this technology has been able to demonstrate fast process times and superior quality on our certified conventional ink in production. This allowed us to fully digitize the solder mask process at low cost – without process or ink adjustments. An excellent benefit to our production in Rot am See.“
Ralf Göhringer (Head of Production WE Rot am See)
I would definitely recommend the Limata machine and team for a future company purchase
Michael Greenaway
Compunetics Inc.
“The Limata ldi has been amazing!! Best thing we did was buy this machine”
Richard Brady
GM
Circuitlabs
“Since 2019, we have been running the Limata X1000 LDI system (including LUVIR for solder mask imaging) in daily production as an addition to our current process with film. The machine was capable of properly exposing Taiyo PSR-4000 BN (DI) solder mask types on normal to high-copper boards using a new and unique direct imaging process. The machine operating interface is very user friendly which allowed for a quick technical training curve. The pre-registration processing reduced several seconds of production time at every print. Limata support and service staff is incomparable. They supported our team every step of the way at basically any time of the day or night, with literally, an immediate response time, customizing the software interface to best fit our Operations and needs.
We have exposed more than 8,000 prints since end of October, on various solder mask colors and some resist film panels. Limata, has proven to be very capable and innovative. They are a strong contender in the industry.
We have very much enjoyed this project, and working with the team!
Thank you Limata for the continued support and being a part of our growth.”
Bill Sezate
Vice President, GM
Summit Interconnect
As a replacement to our current contact exposure process with film, the LIMATA X2000 system including LUVIR-Technology was capable of properly exposing non-LDI solder mask types using a direct imaging process. The machine offers cutting edge software with a very intuitive operating interface which allowed for quick technician training curve. The dual drawer system combined with pre-registration processing reduced several seconds of production time at every machine cycle. Limata support and service staff is world class. They added software patches to keep production running at shortest possible response times, customized the software interface to best fit our in-house Operations system, and even wrote a step-by-step machine processing manual. As a result of the project, we have exposed more than 16,000 times on various product types and solder mask brands/colors. Limata, in a very short timeframe as a company, has definitely shown they are truly innovative and will be challenging the industry of direct imaging for the top spot.
Kevin Beattie
Process Engineer
TTM Technologies
Forest Grove Division